Settings
Go to POS > Settings.
You can configure the following POS settings:
POS menus
The POS menu is the main interface a cashier interacts with. It forms part of the POS screen and contains the articles or actions that can be selected for sale, booking, or ordering.
Here is an example of a modern POS menu displaying catering sales articles:
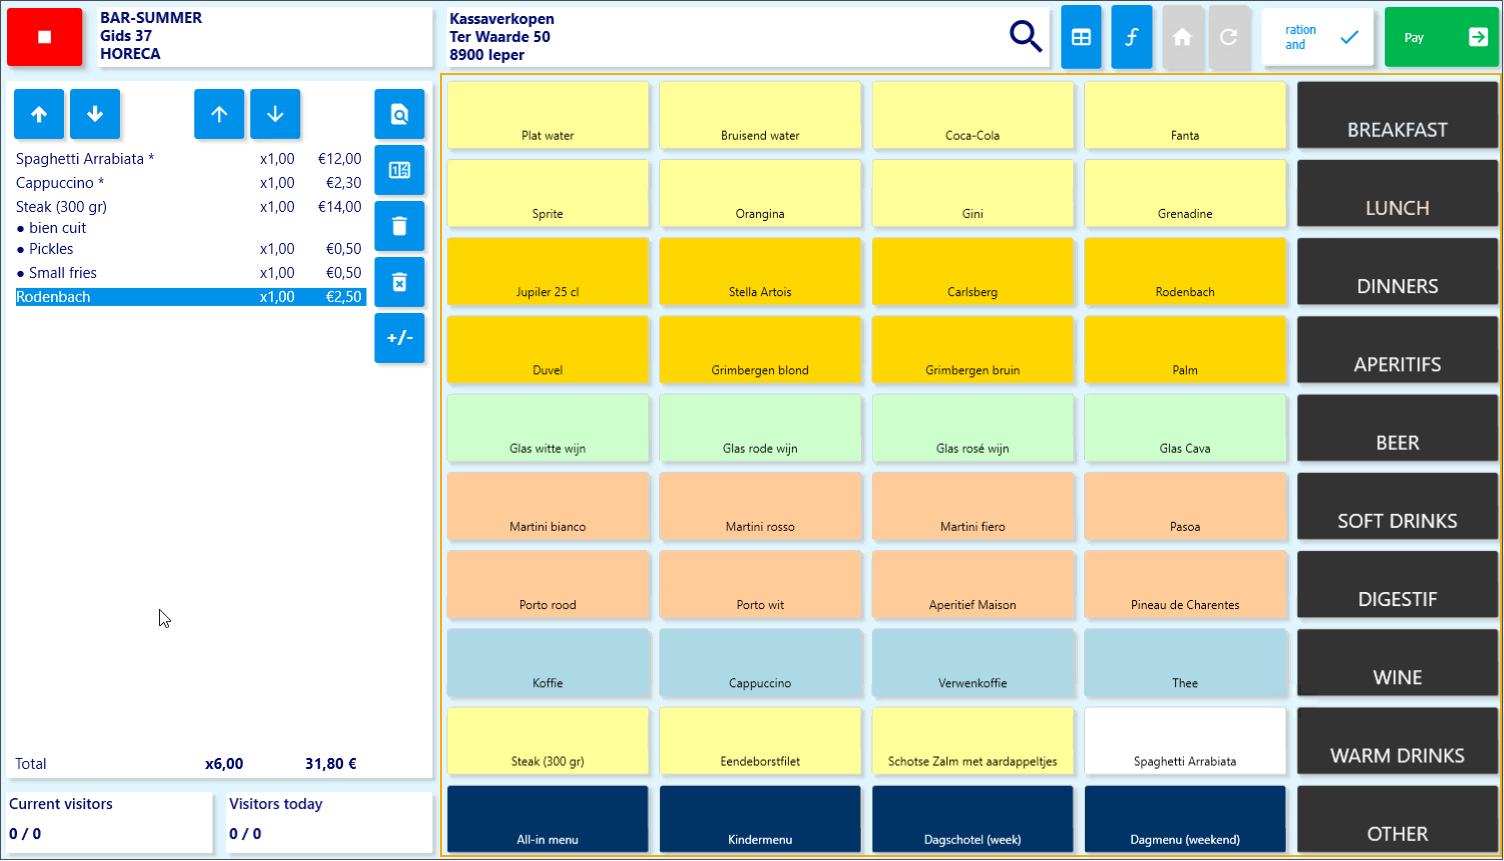
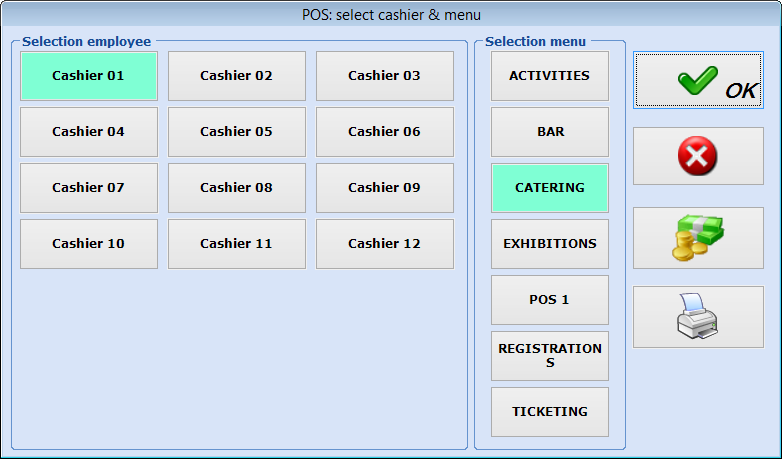
When logging in at the cash register, a cashier must first select their name and then choose a POS menu.
Each cash register (point of sale) can have one or multiple POS menus configured. These menus appear as buttons on the start-up screen of the cash register.
 |
Note
Initially, your Vintia consultant will help set up the POS menus during the launch of Recreatex. Afterwards, you can modify existing menus or create new ones as needed.
Create a POS menu
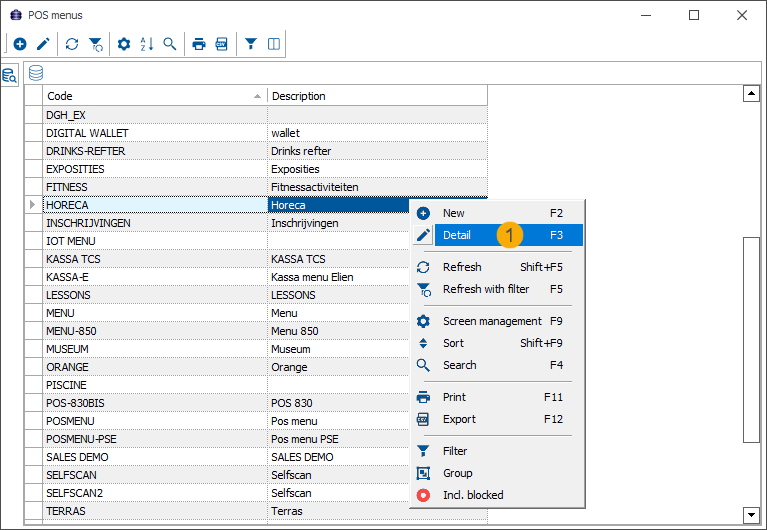
Go to POS > Settings > POS menus to open the overview of all POS menus.
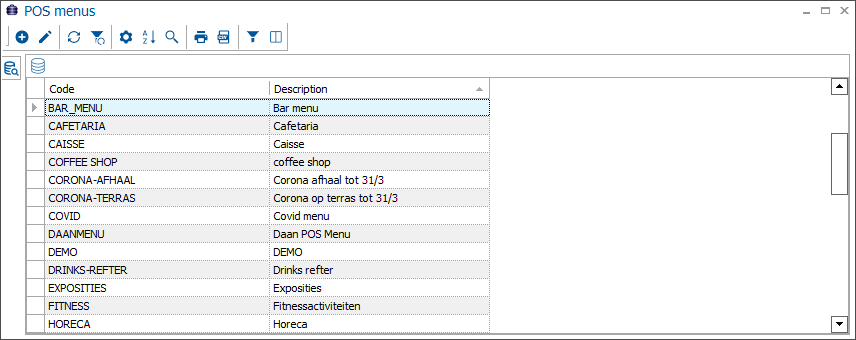
Create, modify or delete POS menus using the available framework functionality.
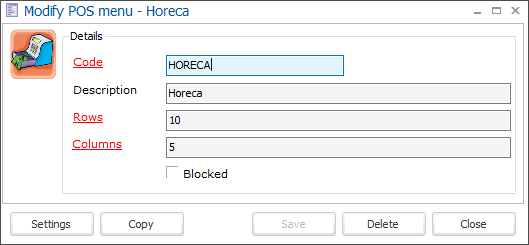
Code | The mandatory code must be unique and preferably descriptive enough so that you can identify the POS menu easily. |
Description | The description of the POS menu. |
Rows & Columns | Choose the number of rows and columns to create the desired button layout. |
To set up the layout of the POS menu, first, click Save if you are creating a new POS menu. Then click Settings to open the Counter menu designer.
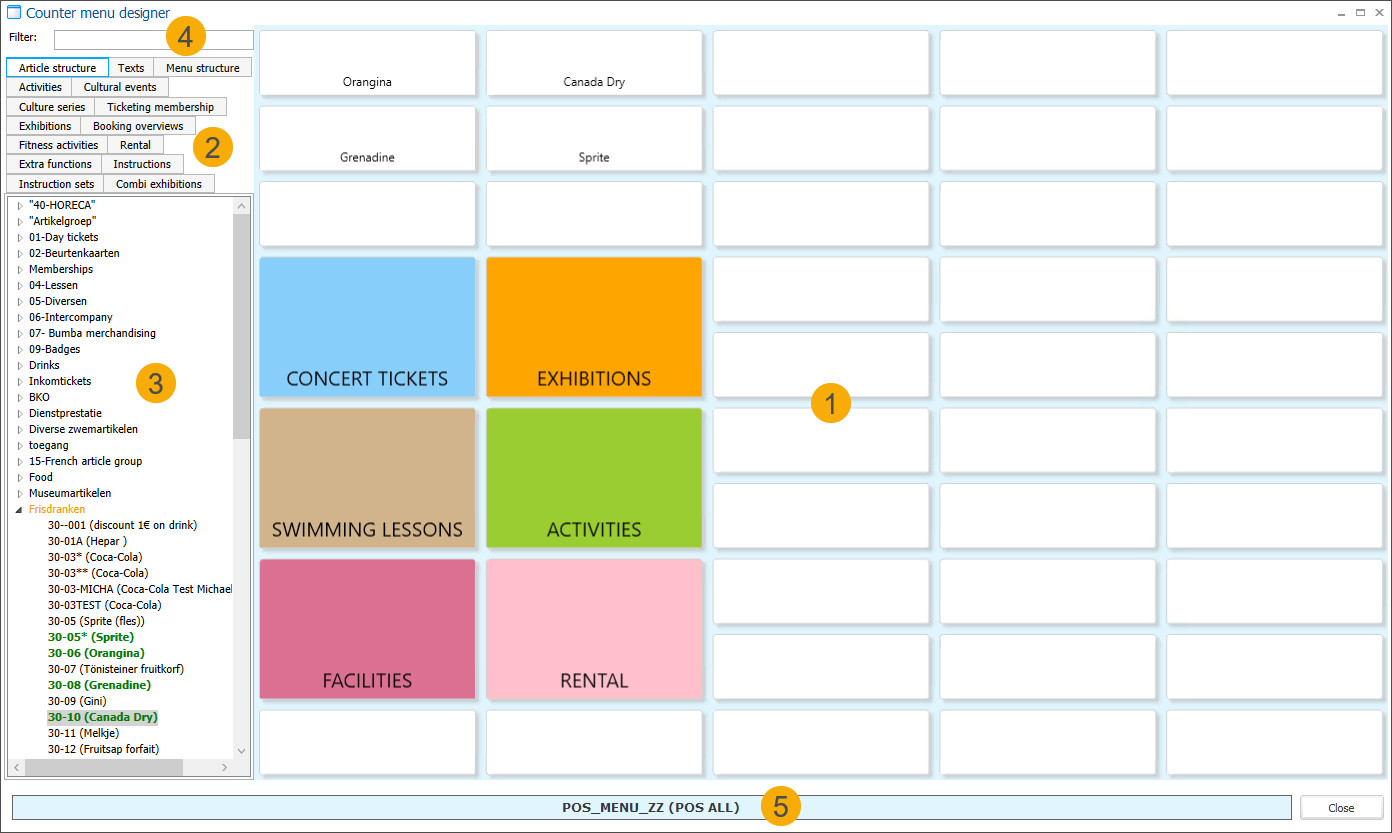
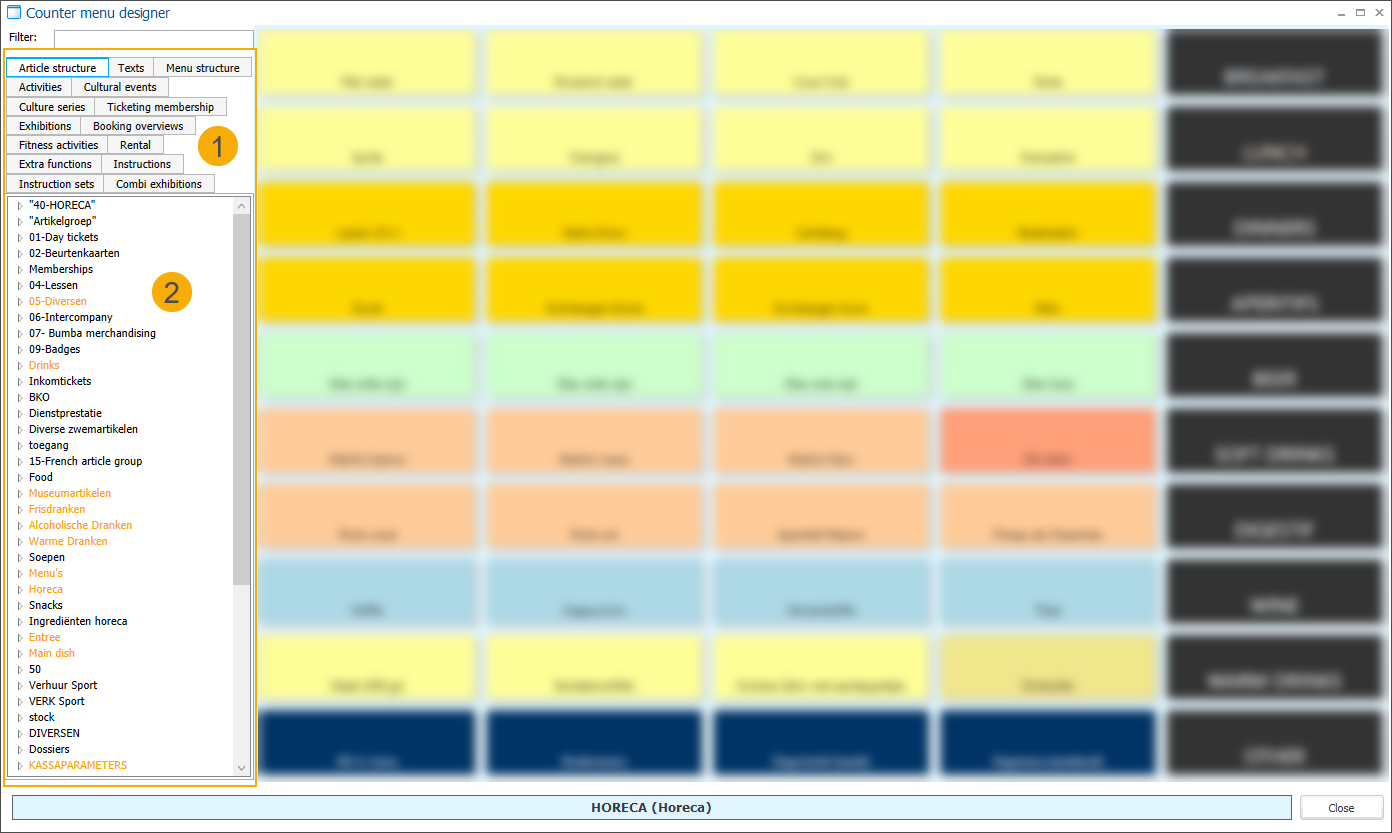
Design area - The main workspace where you create and arrange the layout of your POS menu.
Tabs panel - Items from all available Recreatex modules that can be added to the POS menu are organised into tabs.
Item overview - Shows the list of items within the currently selected tab.
Item filter - A search function to quickly find items across all tabs.
Menu name - Displays the name of the currently selected POS menu.
Note
The old POS menus can be used and modified in the new POS layout. However, POS menus designed for the new POS layout may not give you full functionality in the old POS layout.
Button versus submenu
In a POS menu, we differentiate between buttons and submenus:
Buttons immediately select the linked item (e.g. article, activity, event) at the cash register.
Submenus open an underlying level of buttons within the POS menu.
Why use submenus?
Submenus are helpful when dealing with many sales items or when organising items by category or type. For example:
In a basic article sales setup (e.g. for catering or a gift shop), you might create submenus for appetisers, beers, sodas, etc.

In a multi-module setup, submenus can group sales items per Recreatex module, such as seated ticketing events, activity registrations, or exhibitions.
Create a button
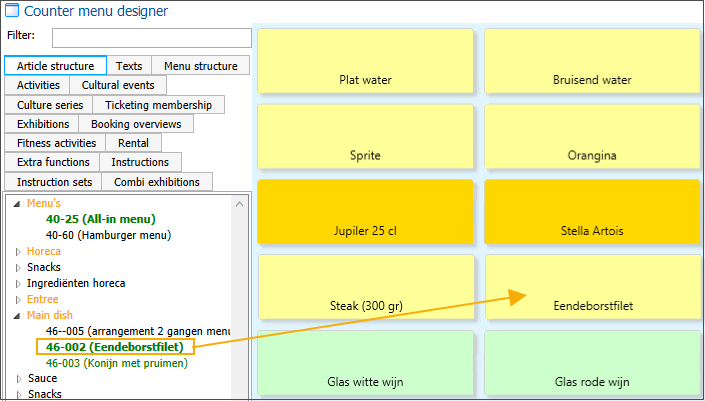
To add an item to the current POS menu, simply use drag and drop.
On the left side of the window, select the relevant tab based on what you want to add (e.g. a sales article, extra function, or another available option). Then choose the specific item from the list in the overview. The selected item is highlighted in grey.
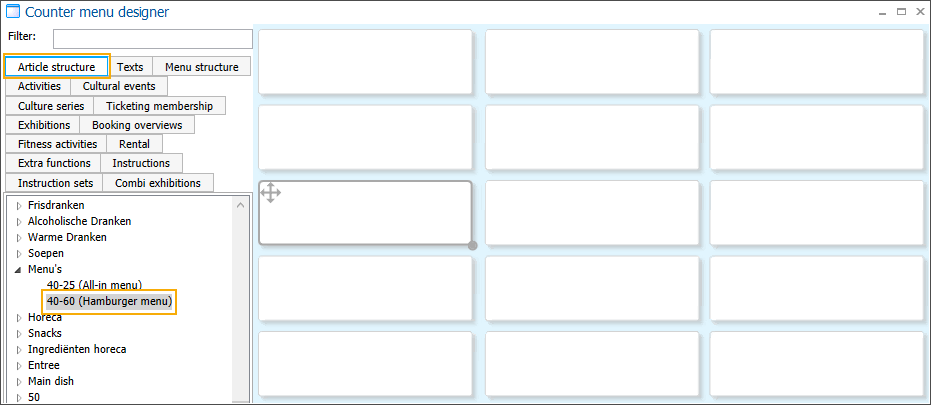
Click and hold the left mouse button on the item, then drag it to the desired spot on the POS menu.

Release the mouse button. The item is now added to the selected button on the menu.
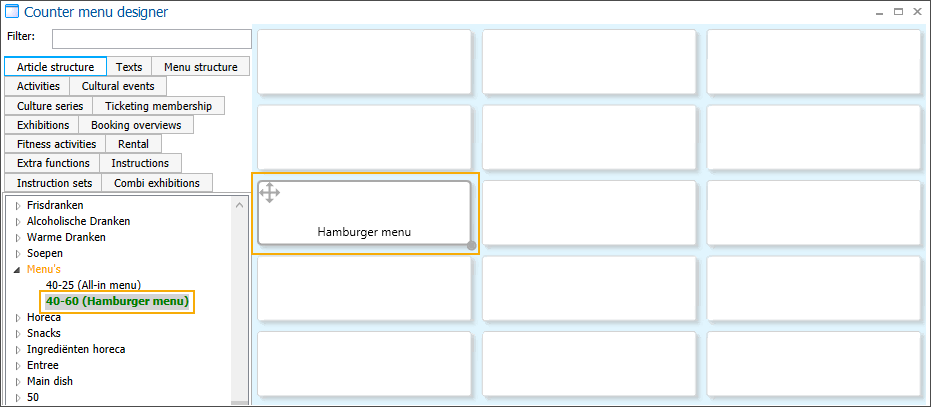
Repeat these steps for each item you want to add to the POS menu.
Adjust and customise the buttons
Resize and move the sales item button to the desired position on the POS menu screen.
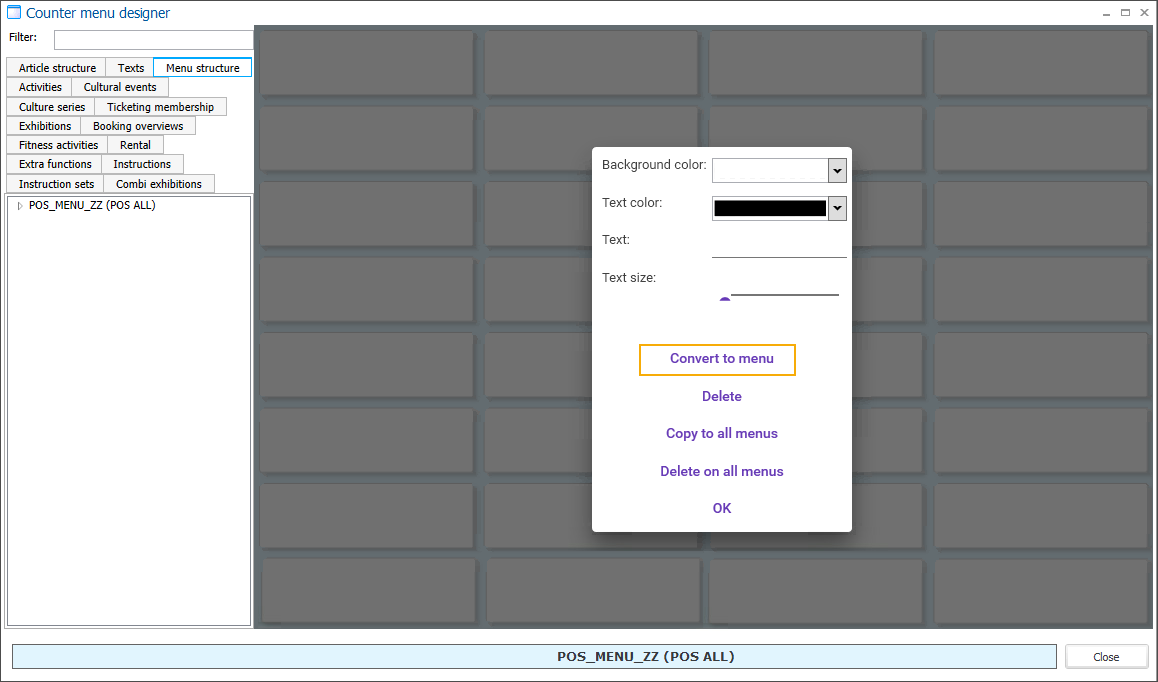
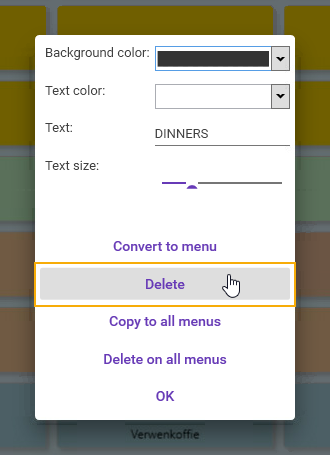
Use the right-click menu options to customise the sales item button's name, background colour, text colour, and font size.

Create a submenu
To create a submenu, you must first add a submenu button and then configure the sales items within it.
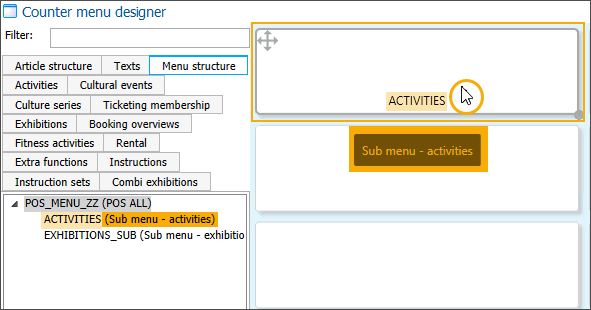
Right-click the button you want to use as a link to the submenu and select Convert to menu.
Enter a code and optionally a description. The number of rows and columns is determined by the main POS menu and cannot be adjusted for a submenu. Click Save.

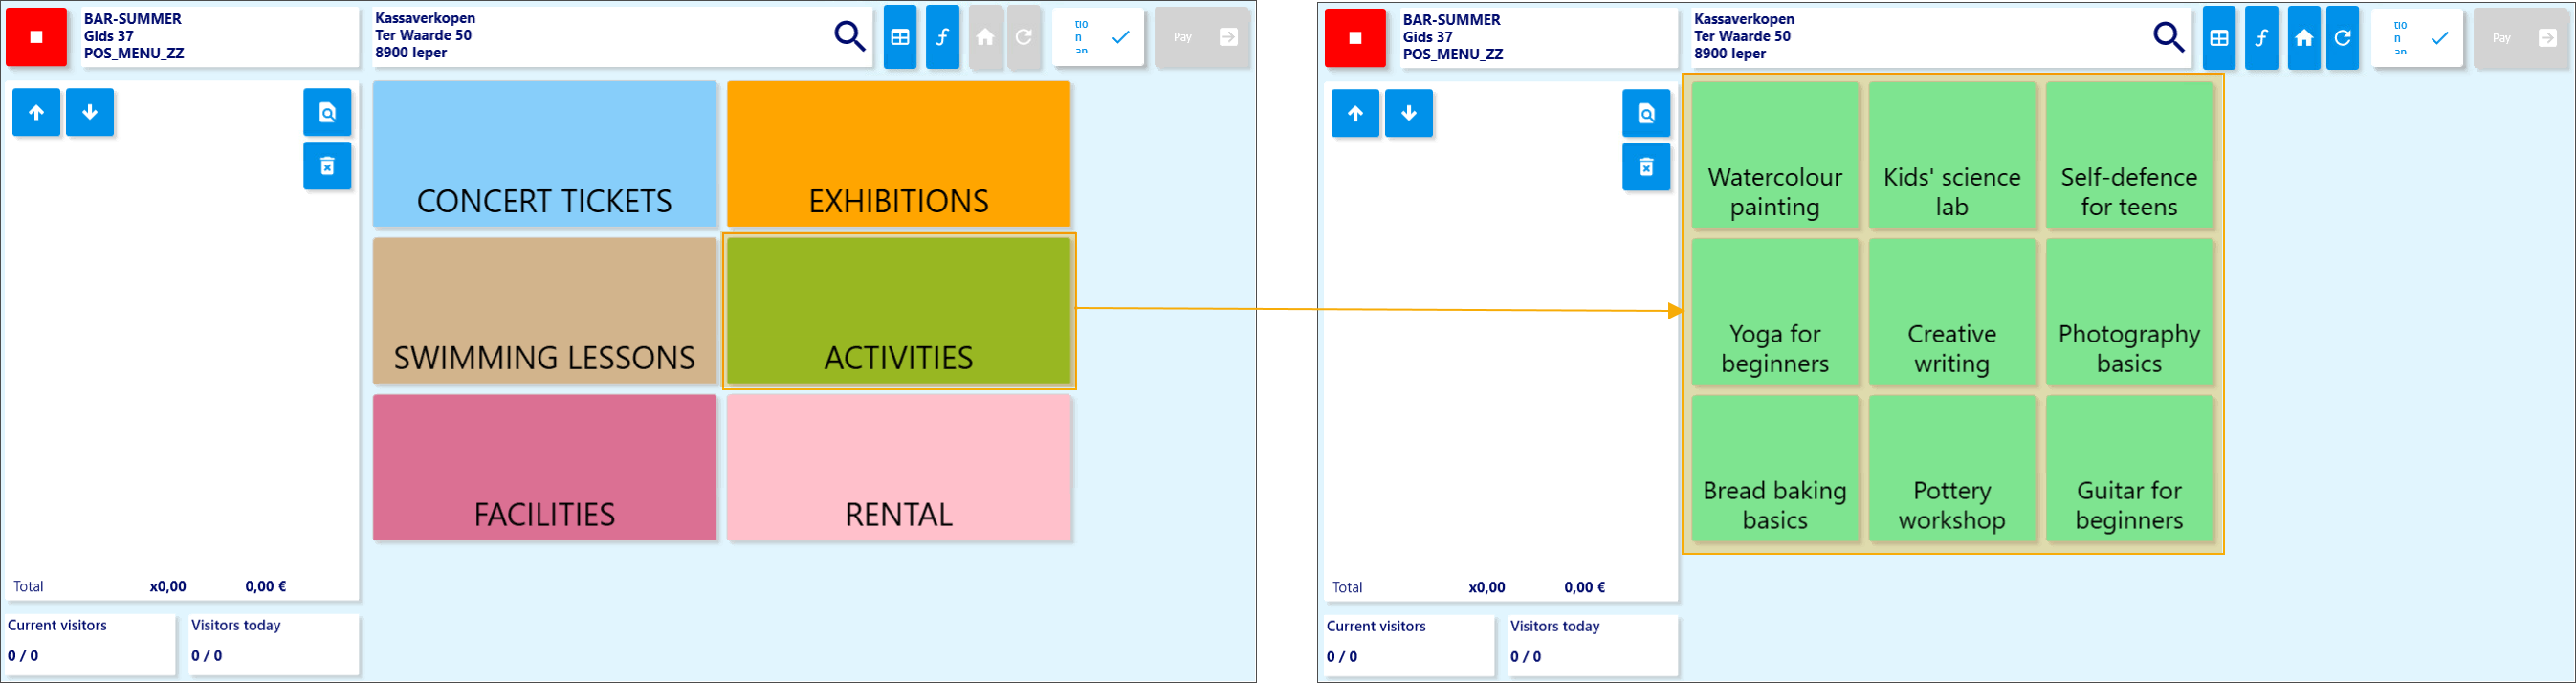
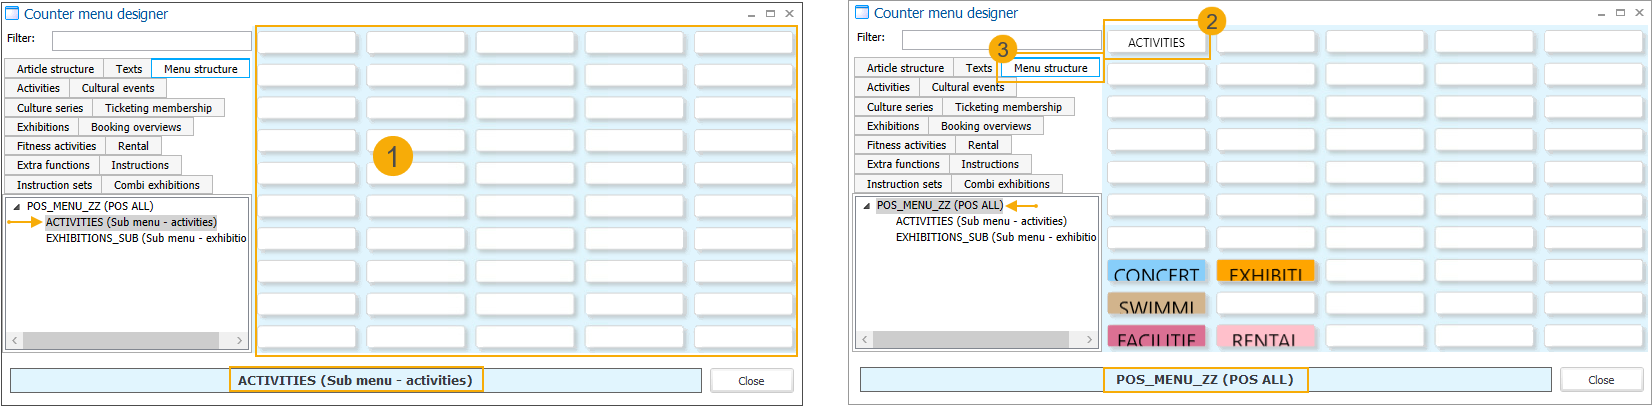
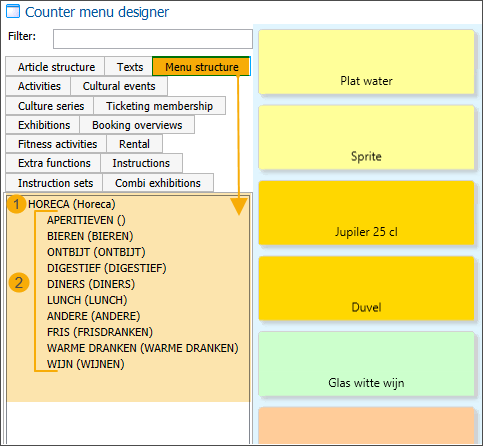
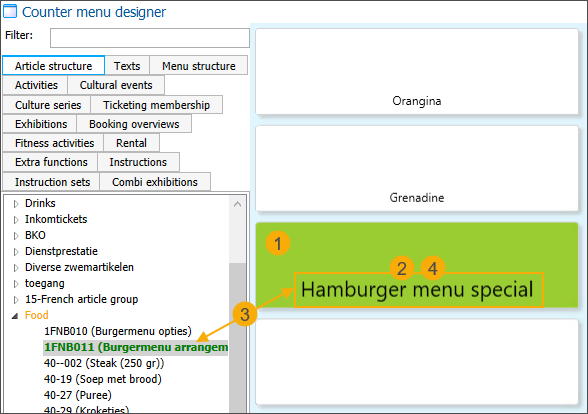
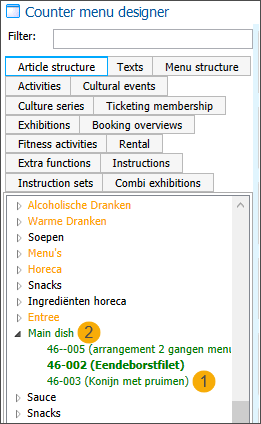
After saving, the button is added to the main menu, but you are automatically taken to the empty submenu (1) where you can add your submenu items. To return to the submenu button (2) on the main menu, go to the tab Menu structure (3) on the left and double-click the main menu in the overview.
The Code (in capital letters) is shown as the button name and also used as a label in the Menu structure overview. If a Description is provided, it appears as a tooltip when hovering over the button and is also displayed in brackets in the Menu structure overview.
Adjust and customise the button
Resize and move the submenu button to the desired position on the POS menu screen.
Use the right-click menu options to customise the submenu button's name, background colour, text colour, and font size.

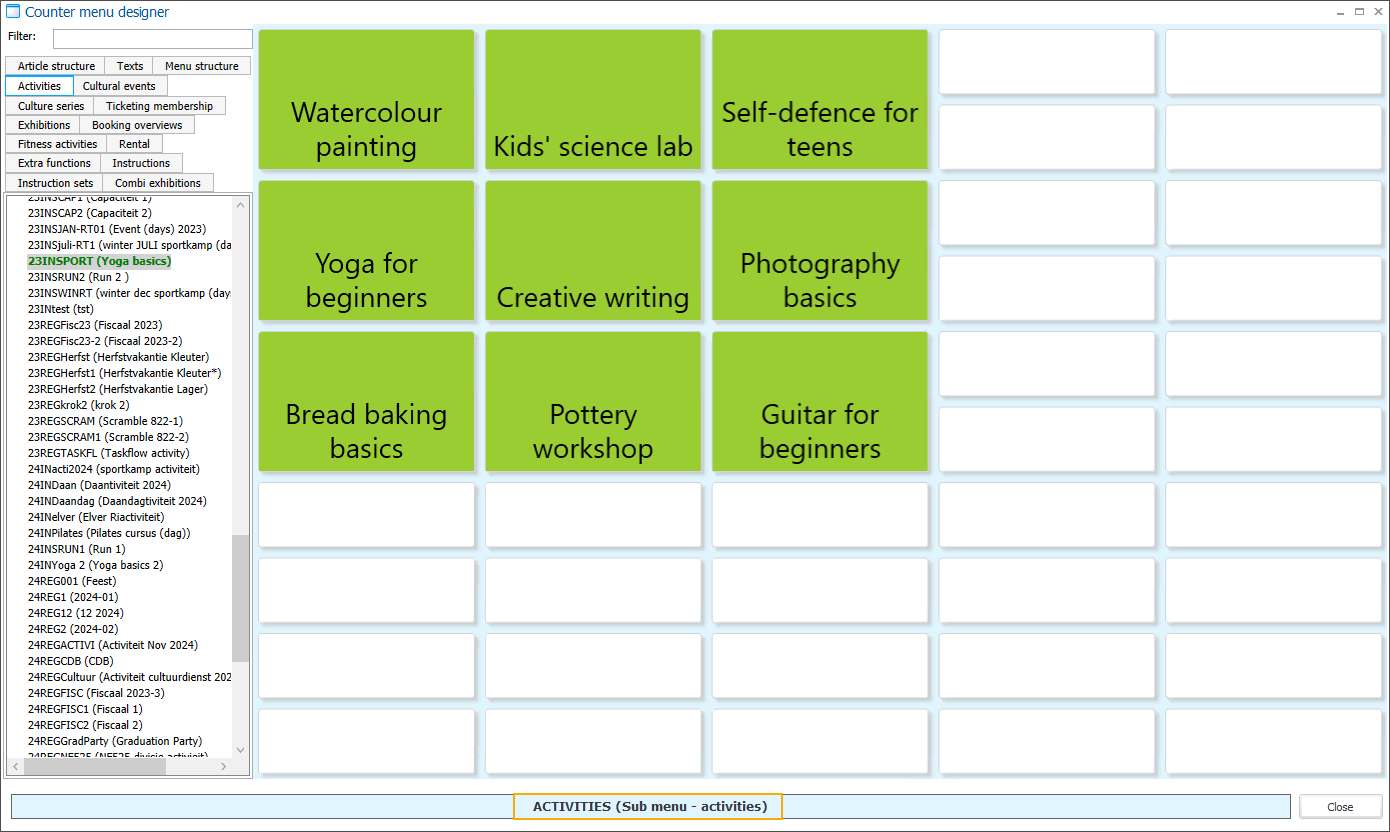
Once in the submenu screen, you will see an empty grid where you can drag and drop your sales items to create the sales item buttons within the submenu.
Menu structure
The Menu structure tab on the left shows an overview of all current submenus in the POS menu. Submenus (2) appear below the main menu (1) and can be clicked directly for quick navigation, instead of using the submenu buttons on the POS menu screen.
When viewing a submenu, the menu structure is the only way to return to the main menu.
Double-click the desired submenu item (2) in the menu structure to navigate to a submenu.
Double-click the first item in the menu structure (1) to return to the main menu.
Resize and arrange buttons
You can customise the position and size of the item or submenu buttons in the POS layout using drag-and-drop actions:
Move
Resize
Note
Buttons snap to a fixed grid, meaning they can only be moved or resized in steps equal to one grid cell, which is also the minimum size of a button.
To resize a button
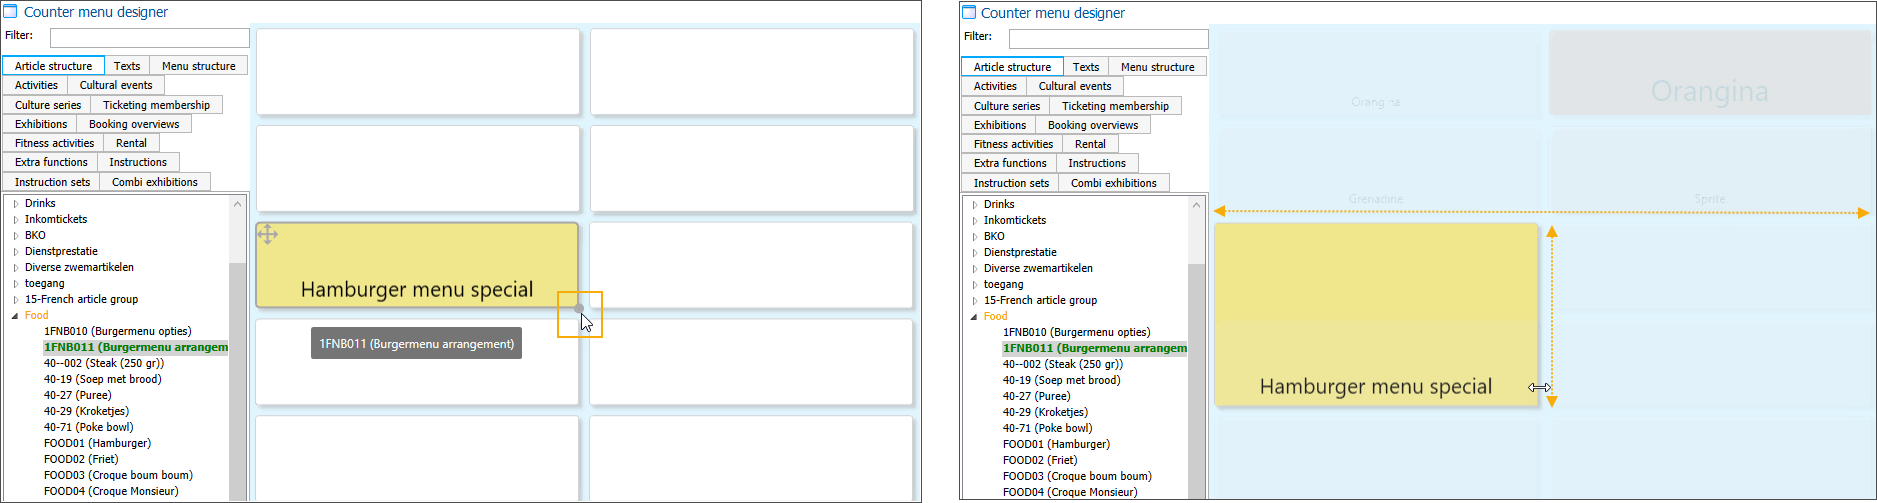
Hover over the resize icon in the bottom-right corner of the button.
Click and hold the left mouse button.
Drag to adjust the size as desired.
Release the mouse button to apply the new size.
To move a button
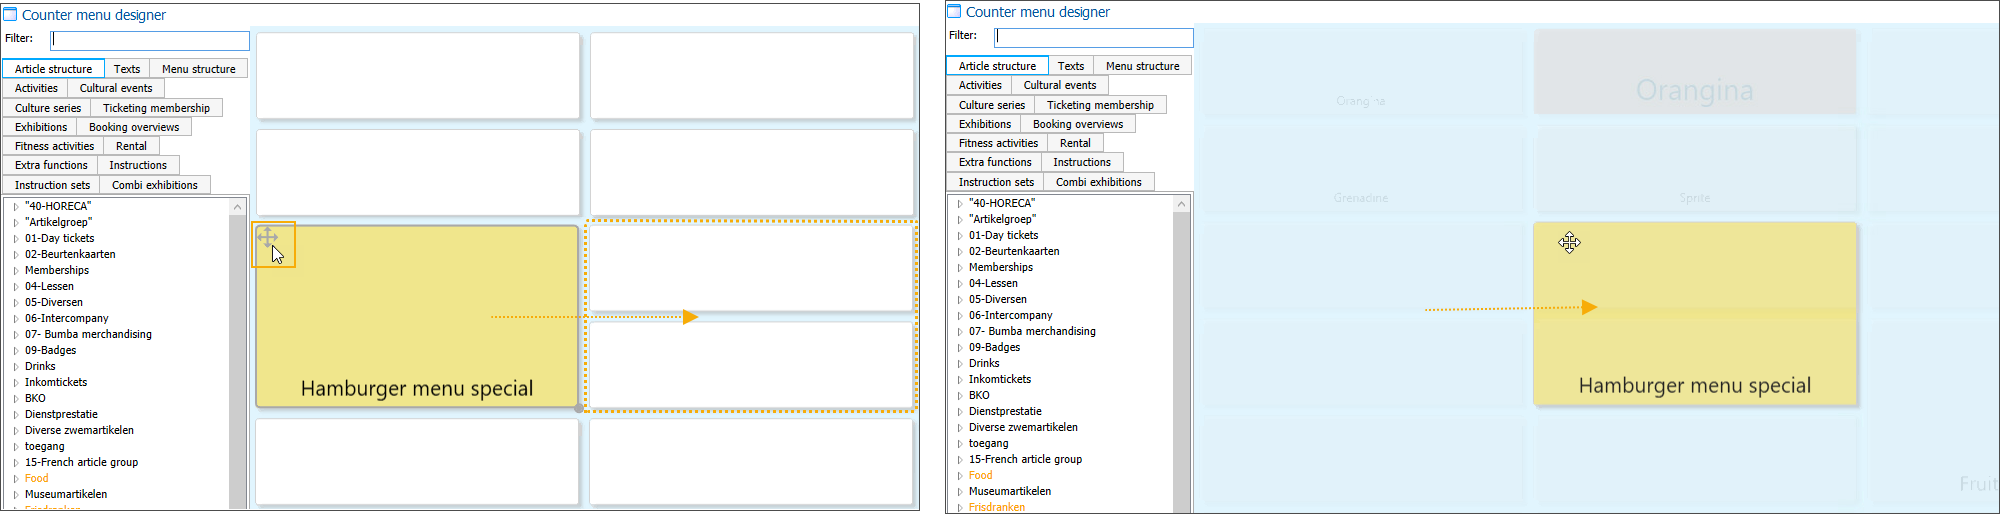
Hover over the move icon in the top-left corner of the button.
Click and hold the left mouse button.
Drag the button to an empty position in the layout.
Release the mouse button to place it.
Note
Buttons can only be moved to empty positions, not yet linked to other sales items or submenus.
Customise button settings
Customising POS buttons with specific colours, text sizes, or custom labels is recommended, as it helps users quickly recognise article categories and distinguish submenu buttons from sales items.
Change the button settings by right-clicking on a button:
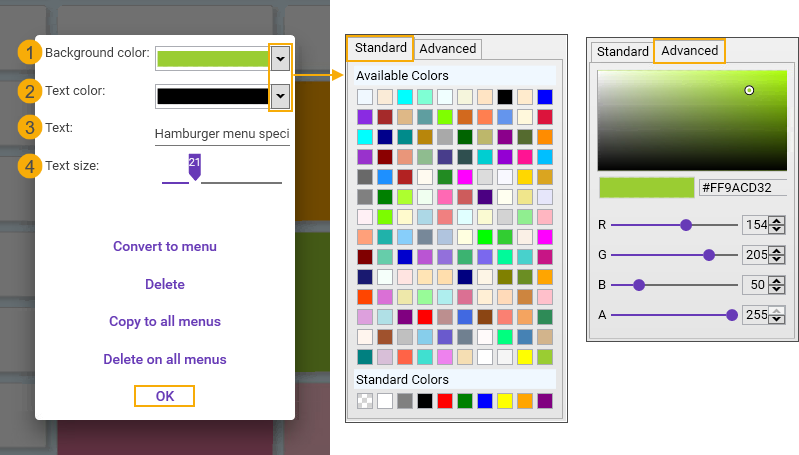
Adjust the button background colour.
The colour picker allows you to choose from a range of standard colours or define a custom colour.
Adjust the button text colour.
The colour picker allows you to choose from a range of standard colours or define a custom colour.
Adjust the button text.
You can always rename a sales item or submenu button if you want a different button label than the code (shown by default for submenu buttons) or description (displayed by default for sales items).
Adjust the text size by moving the slider.
Click OK to confirm the changes.
Copy buttons to all submenus
Use the Copy to all menus function:
When you want submenu buttons to be accessible from each submenu for easy navigation.
When you need frequently used action buttons (e.g. a 50% discount button) available across all submenus.
Before copying:
Finalise the button design (e.g. size, position, background colour, text colour, and font size).
Ensure the target position is free in each submenu to prevent overwriting existing buttons.
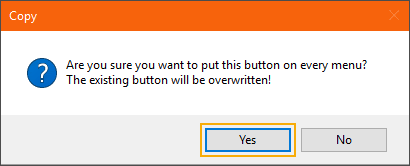
To copy a button to all menus, right-click the button and select Copy to all menus.
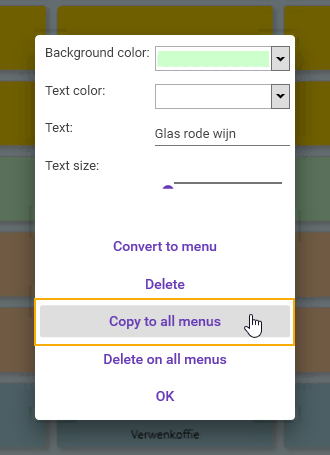
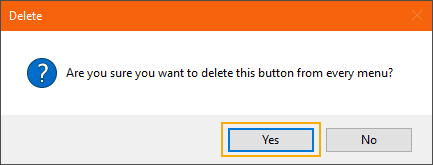
Click Yes to confirm the action and copy the button to all menus.
If changes are needed after copying:
Update the button design and copy it to all submenus again to overwrite the existing button in each submenu.
Alternatively, you can manually adjust the button in specific submenus if the design change shouldn’t apply to all submenus.
Delete buttons from submenus
You can remove buttons or submenu buttons in two ways:
Delete from all submenus: This action removes the selected button or submenu button from all submenus in the POS menu in a single action.
Delete from a single submenu: Use this option to remove a button or submenu button from a single submenu at a time. This is useful when a button was copied to several submenus, but you want to delete it only from certain locations.
1. Delete button from all submenus
To delete a button across all submenus, right-click the button and select Delete on all menus.
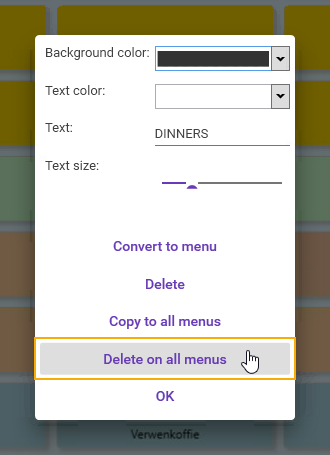
Click Yes on the confirmation message to complete the removal.
The system automatically removes the button in the same position across all submenus without performing any checks, leaving the button placeholder empty.
Caution
Removing a submenu button from all menus permanently deletes the submenu and all its items. The submenu will no longer appear in the Menu structure tab, so if needed later, it will have to be recreated manually.
Delete button from a single submenu
To delete a sales item or submenu button from a single (sub)menu at a time, right-click the button and select Delete.
The sales item or submenu button is deleted instantly, without a confirmation prompt.
Tabs panel and item overview
The following sections provide an overview of the different items that can be added as buttons to the POS menu.
In the Counter menu designer window, you can navigate through the tabs panel (1) on the left. When you select a tab, the item overview (2) below displays the corresponding items that can be placed on the menu.
The availability of items in specific tabs depends on the Recreatex modules included in your license.
Note
Items that are blocked in Recreatex are not shown in the item overview.
Colours in the item overview
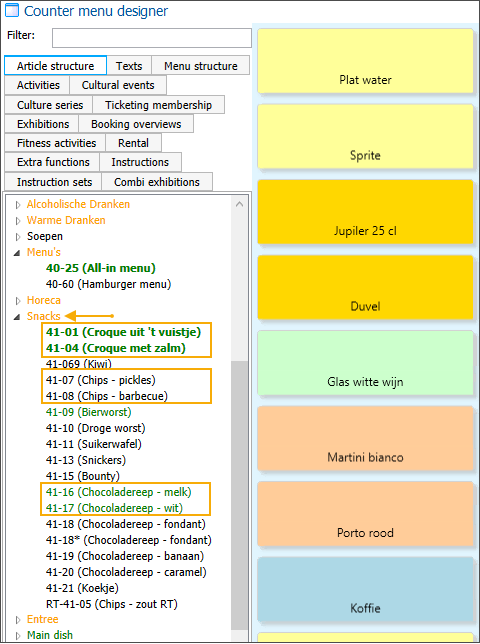
In the item overview, different colours help you quickly see whether an item is already placed on the current POS menu.
Black: The item is not on the current POS menu. (1)
Although article groups can be created for any type of article, only general sales articles (tab Article structure) and rental articles (tab Rental) actively use these groups. That’s why, in the item overview, these articles are shown within collapsible article groups. If a group label appears in black, it means that none of the articles in that group are currently placed on the POS menu. (2)
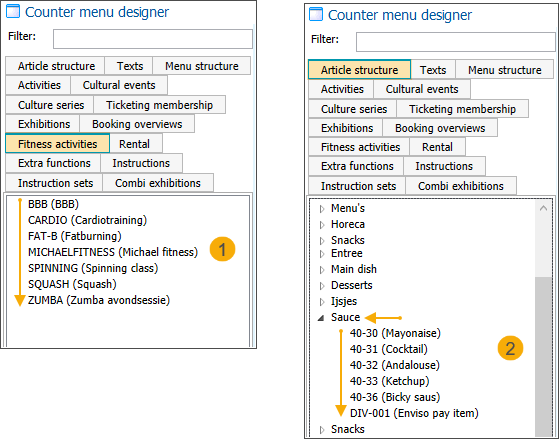
Green (bold): The item is on the POS menu and also visible in the currently displayed button overview (main menu or submenu).
Green (not bold): The item is on the POS menu, but not in the currently displayed button overview (main menu or submenu). (1)
For collapsible article groups, if the article group label is this colour, it means that all articles in that group are used on some level of the POS menu. (2)
Orange: Only used in the Article structure and Rental tabs for collapsible article groups. An article group label in orange indicates that some, but not all, articles in the group are used at some level of the POS menu.
Overview of item types
Items that can be added to the POS menu from all available Recreatex modules are organised into tabs. The item types included are listed below.
Article structure: This tab contains all articles from the General – Articles module for which the Add to POS sales option is active in the article card (under the tab POS) and are not defined as rental articles. The articles in this list are grouped by article group.
When you select one of these articles at the cash register, a general POS sale is registered in Recreatex.
Activities: This tab contains the available activities from the Recreatex module Activities. When you select an activity at the cash register, an activity registration is recorded.
Cultural events: This tab shows the available events from the Recreatex module Seated ticketing. When you select an event at the cash register, a ticketing booking is created in Recreatex.
Culture series: This tab shows the available event series from the Recreatex module Seated ticketing. When you select an event series at the cash register, a ticketing booking for a full series is created in Recreatex.
Ticketing membership: This tab shows the available ticketing memberships from the Recreatex module Seated ticketing configured to give access to multiple ticketing events. When you select a ticketing membership at the cash register, the system registers the sale of a membership that includes access to all linked events.
Exhibitions: This tab shows all available exhibitions from the Recreatex module Timeslot ticketing. When you select an exhibition at the cash register, an exhibition visit is registered.
Combi exhibitions: This tab shows all available combi exhibitions from the Recreatex module Timeslot ticketing.
Booking overviews: This tab shows the available booking overviews from the Recreatex module Facility bookings. When you select a booking overview at the cash register, a calendar opens, showing all places linked to that overview, allowing you to select a place and register a facility booking.
Fitness activities: This tab shows the available fitness activities from the Recreatex Fitness module. When you select a fitness activity at the cash register, a fitness booking will be registered.
Rental: This tab shows all available articles configured as rental articles. When you select a rental article at the cash register, a rental order will be registered.
Instruction sets:
Instructions:
Texts: This tab shows the available texts configured in the module POS (under Settings > Texts) that can be added as POS buttons. When you select a text at the cash register, it will be added to the sales overview and printed on the receipt.
Extra functions: This tab shows all available extra functions that can be used at the POS. Most of the extra functions are accessible via the Extra functions button on the POS screen, but you can also add specific functions directly as individual buttons to allow the cashier to access frequently used functions faster.
Copy a POS menu
You can copy an existing POS menu, for example, to use it as a starting point for a new POS menu with similar content or structure.
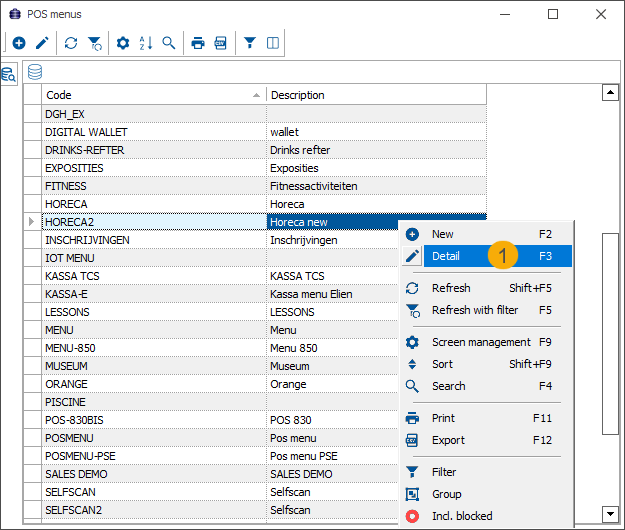
Go to POS > Settings > POS menus and open the detail of the POS menu you want to copy.
Click Copy in the Modify POS menu window.
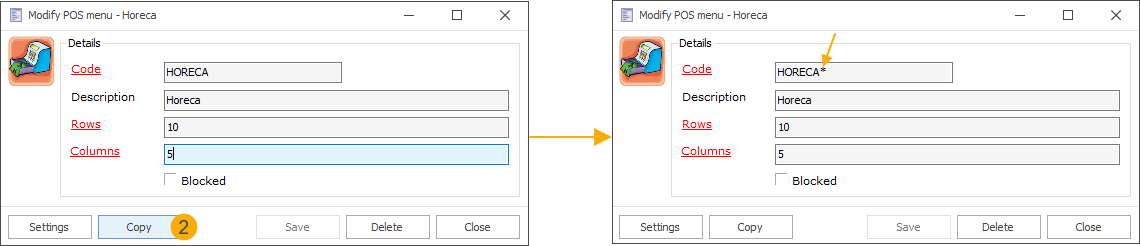
The POS menu is copied immediately without a confirmation message, and the copy is displayed on screen. An asterisk (*) is added to the original code to indicate that it is a duplicate version of the POS menu.
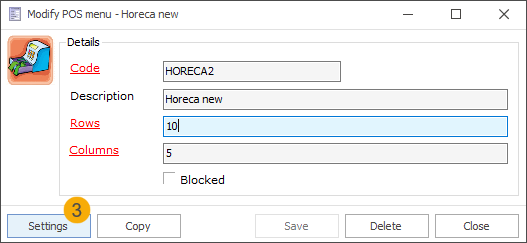
Modify the Code and/or Description of the copied POS menu, if needed.
Modify the number of Rows and Columns in a copied POS menu.
Important
Keep in mind that the copy includes all linked items and submenus from the original. If you reduce the number of buttons in the grid, some items may no longer be visible.
Click Save to confirm the modifications.
Click Settings to start editing the POS menu.
Delete a POS menu
To permanently remove a POS menu from the system, ensure it is no longer needed.
Go to POS > Settings > POS menus and open the detail of the POS menu you want to delete.
Click Delete in the Modify POS menu window.
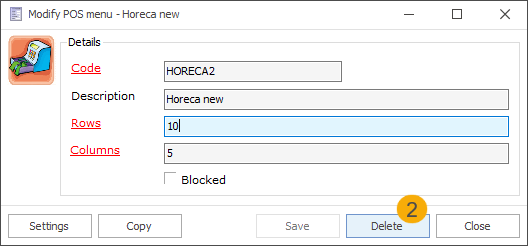
A confirmation message will appear:
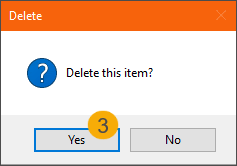
Click Yes to confirm and permanently remove the POS menu from the system.
Sales zones
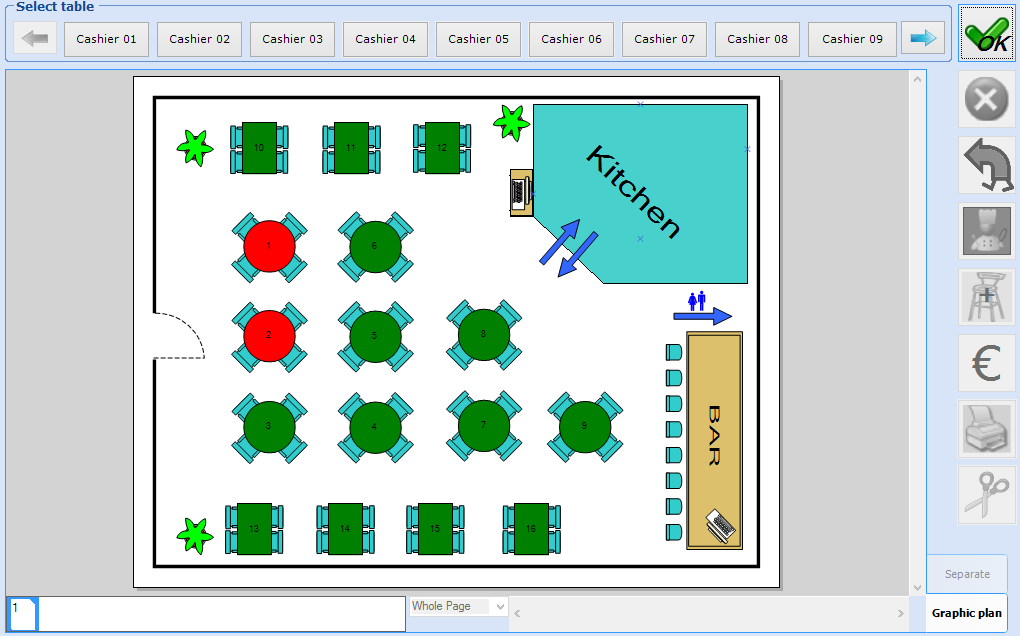
A sales zone is a graphic overview of the hall/place in which tables and/or chairs can be placed. This is also called the table plan, and this way of selling is mainly used in catering facilities. In this case, a sales zone is set up on the point of sale linked to the cash register.
An example of a sales zone used at the cash register (see also POS - Use)
 |
In the next paragraphs, we will explain how to create a sales zone and design table layout.
Go to POS > Settings > Sales zones to open the overview of all available sales zones:
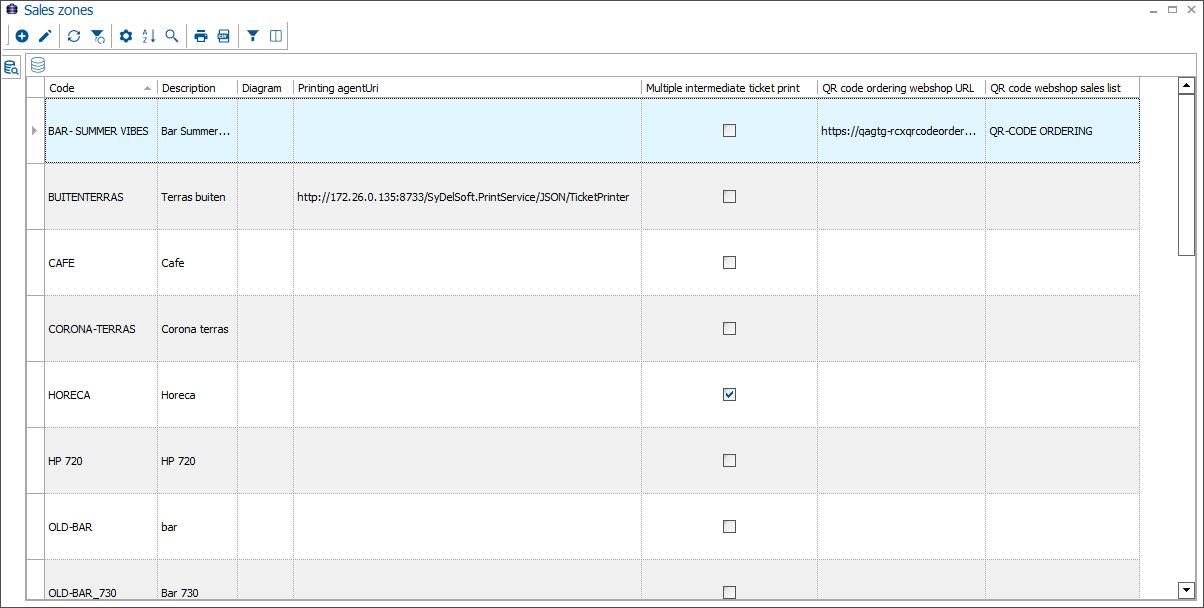
Use the available framework functionality to create, modify or delete sales zones.
In the tab General, fill in the basic sales zone information.
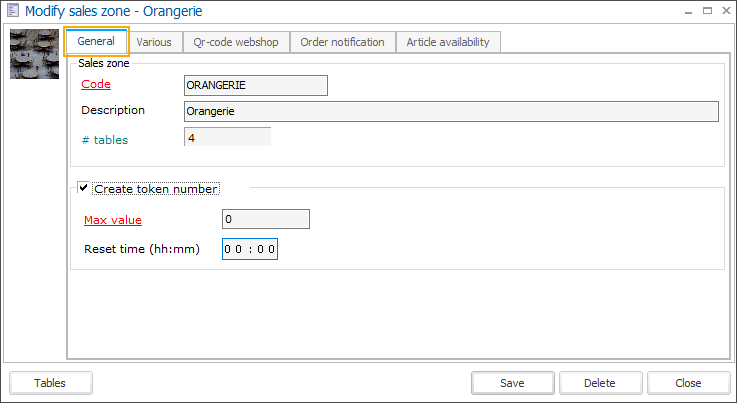
Code | Is unique and mandatory. It is advised to choose a relevant code so that you can immediately derive from the code in which the sales zone is concerned. |
Description | The description of the sales zone. |
# tables | The number of tables that are in the current sales zone. This value can not be modified here; it is calculated based on the table plan in the diagram editor. |
In the tab Qr code webshop, you find the configuration options related to the QR ordering app and F&B kiosk.
To define or modify the layout/structure of the current sales zone, you have to click on Tables. The diagram editor will appear.
Diagram editor
Managing a sales zone (table plan) is always done in the "diagram editor". This is a separate application in the form of a design program, in which at least a number of tables have to be defined. It is also possible to draw additional objects in order to match the sales zone as perfectly as possible to reality.
In order to have access to the diagram editor, you have to click on Tables after selecting/creating the sales zone (see previous paragraph).
Note
If you start using a sales zone at the cash register for the first time, it is advised to start from the sales zone Horeca, that is available as a default sales zone in Recreatex. In this way you will become familiar with the different elements in the graphic table plan.
If you want to create a new table plan, the diagram editor will be opened with a blank page:
 |
In case of an existing sales zone, the current layout of that table plan will appear:
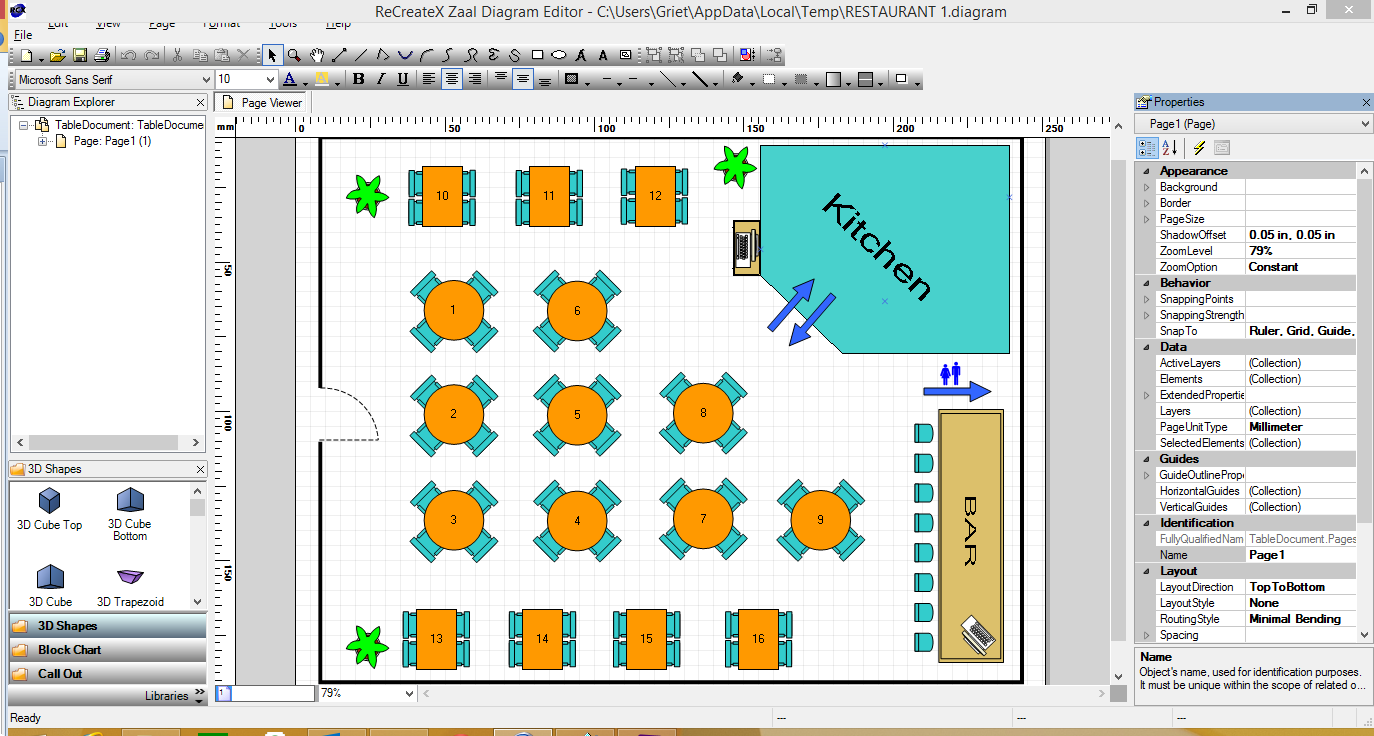 |
Tables
Note
Since the diagram editor is a separate design program, it is advised to have the sales zones in Recreatex created by someone who is familiar with design software, such as Adobe Photoshop, Adobe Illustrator, ...
We also advise you to consult the next paragraphs for extra information and tips on how to use the diagram editor.
In order to effectively register sales per table at the Recreatex cash register, these tables have to be placed on the table plan using specific design objects. Moreover, these objects have to be taken explicitly from the CounterSales library.
Warning
It is thus not sufficient to use circles or rectangular objects from the default library! These will be shown on the table plan but you will, however, not be able to select such tables in case of sales at the cash register.
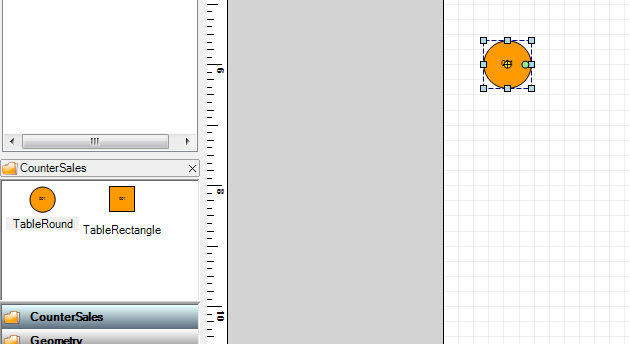
The CounterSales library can be selected in the lower left-hand corner of the diagram editor:
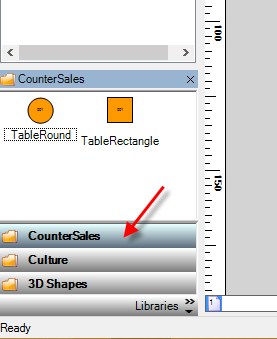 |
If you click on the CounterSales library the available objects are shown:
 |
The only two objects that can be used to register sales at the cash register are:
TableRound (round table)
TableRectangle (rectangular table)
Other objects are also possible, these will however only serve as decoration in the table plan.
In order to place a table object on the page, you can use the drag-and-drop principle (click and drag):
Click on the table object and keep pressing on the left mouse button.
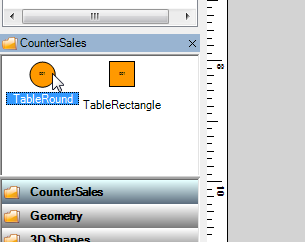 |
Drag the object to the page.
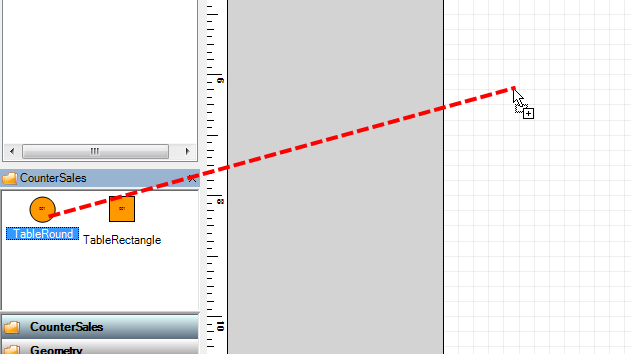 |
Let go of the left mouse button. The object will appear on the page.
 |
Use this method to set up all required tables for the sales zone. Each table that is added to the sales zone will get a unique number that follows the number of the last table that was added.
If you have finished the design of the sales zone, you still have to save it before returning to Recreatex.
In order to save the table plan, you have to click in the upper left-hand corner of the toolbar of the diagram editor on Save the open diagram.
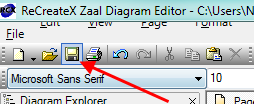 |
Another way to save the table plan is by closing the window, after which the message below will appear:
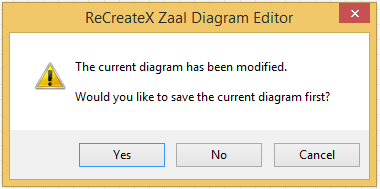 |
If you confirm this message (Yes) the table plan will be saved.
If you link the new sales zone to a point of sale (see Salesmanual 'GENERAL - Sales'), you will be able to use the table plan at the cash register (see POS - Usemanual 'POS - Use').
The rest of the design
Once the required tables have been placed on the design, it may be useful to add additional objects. In case of a symmetric table plan, it may for example be required to add certain indications, so that the user can easily orient himself on the table plan. The locations of entrances and exists and other things that are in the sales zone, can all contribute to the clearness of the table plan.
Using the diagram editor many different objects can be added to the table plan.
These objects can be found in the available object libraries in the lower left-hand corner of the diagram editor.
If you click on Libraries an overview will appear of all available libraries that contain objects that can be placed on the design page.
 |
Warning
If you create a table plan, it is not allowed to use objects from the Culture and Lockers libraries! These objects are reserved for the layout of zone plans in the Ticketing and LOXS (lockers) modules.
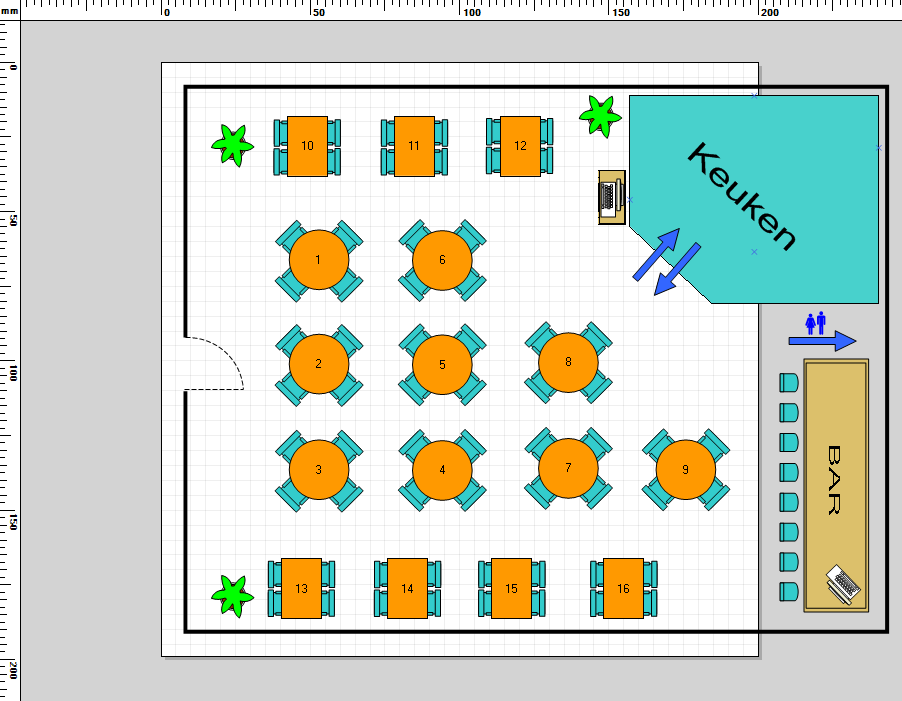
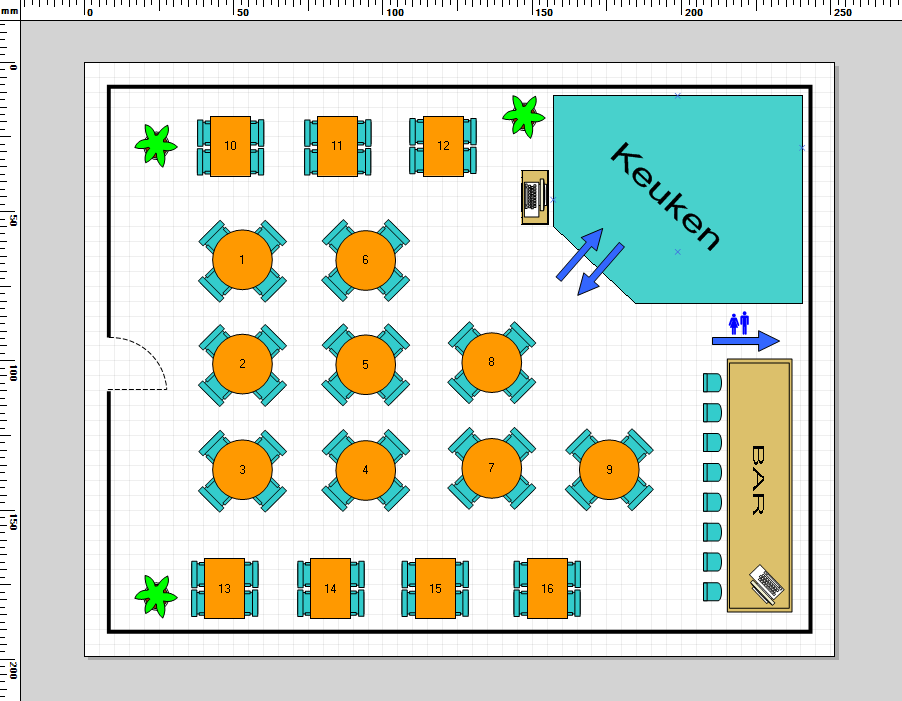
An example of an extensive table plan:
 |
General tips
The following functionalities of the diagram editor can be very useful when creating a sales zone/table plan.
Move objects: If you want to move an object, you first have to click on the object after which you can drag the object to the desired position.
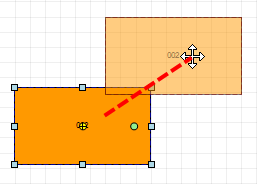 |
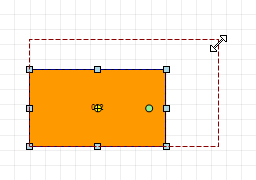
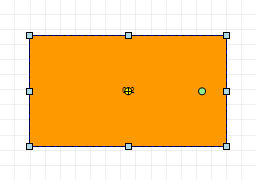
Make objects larger/smaller: If you want to modify the size of a certain object, you first have to click on the object after which you can click on one of the object handles and drag it.
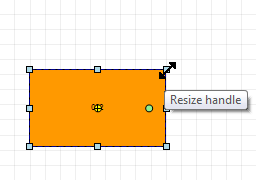 |
 |
 |
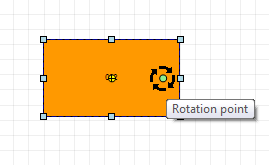
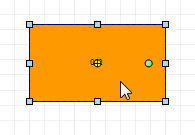
Rotate objects: If you want to rotate an object (turn it in a certain angle), you have to click on the green handle of the object and rotate it.
 |
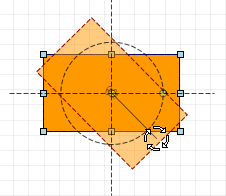 |
 |
Tip
The object manipulations above are also possible by means of the Size and location part in the Properties window (right part of the window):
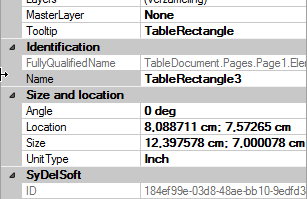 |
Copy/paste objects: Copying and pasting can be an alternative that allows to place a large number of tables more quickly on the table plan.In order to copy and paste objects within the table plan, you can use the classic procedures: either click on the right mouse button > Copy element > Click on the right mouse button > Paste element, either by means of the key combination ctrl+c/ctrl+v. A unique table number will also be given to each copy.
Modify table number: A unique number is given by default to each added table object (see previous paragraph), starting from 001. When creating a table plan it may be necessary that the table numbers are modified. We make a difference between two principles:
Modify index number: Modifying the index number will lead to the effective modification of the table number in Recreatex. Sales are registered on the index number, and it is the index number that determines the visualisation of the table number on the receipt. In order to modify the index number of a table, you first have to click on the table object in question and then modify the value next to Index, in the SyDelSoft part of the Properties window (right part of the screen):
 |
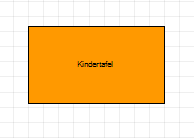
Only visually: Modifying the table name or table number in this way does only influences the visualisation of the table name in the table plan if the latter is used at the cash register. The underlying index number will remain the same (see previous method). If you want to modify the table name or number in this way, you first have to double-click on the table object in question, after which you can fill in the desired name or number. Finally, click outside the frame to confirm the modifications.
 |
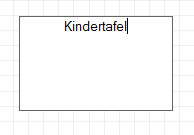 |
 |
Modify the size of the design page: The diagram editor has many classic page settings that influence the size of the design page. There is, however, one setting that can be very useful when finalising the table plan, i.e. the option Fit to content (modify the size to the content), to be found under the Page menu on top of the diagram editor.
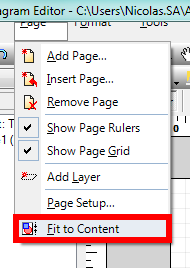 |
This option in fact modifies the size of the design page on the basis of the objects that are currently on the screen. In this way, it is possible to place table objects and other objects outside the frame of the initial page and to use the function Fit to content afterwards. If the present objects take a relatively small space on the design page and if there is thus a lot of white space, this option can be useful to automatically modify the size of the design page.
Note
The diagram editor contains many other functions as well, with which users that have experience with other design packages will be familiar, for example on the level of aligning, snaps, guides, etc. These functions can then also be used during the creation of the table plan.
Sales lists
A sales list is a specific list with articles. If a sales list is set up for the point of sale linked to the cash register, this sales list will determine the content of the article list that can be consulted under POS: Extra functions > Find article (see also Sales and POS - Usemanual 'GENERAL - Sales' and 'POS - Use').
Using a sales list can for example be useful to select articles at the cash register that are sold only sporadically, without having to provide POS buttons.
Note
A sales list has to contain a minimum number of articles that are on the POS menu (linked to the point of sale). If you scan article barcodes at the cash register, the system will in fact also check if the article in question is on the linked sales list.
If no sales list is linked to the point of sale, all articles that are on the POS menu will of course remain available for sale.
Sales lists are managed under POS > Settings > Sales lists.
An overview of all available sales lists will appear.
 |
You can create, modify or delete sales lists at all times.
(see manual 'FRAMEWORK'Framework)
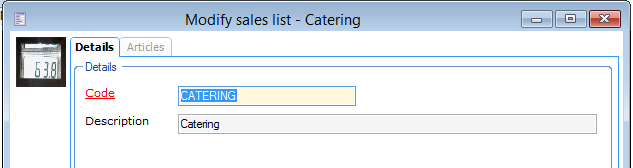 |
Code | Is unique and mandatory. It is advised to choose a relevant code so that you can immediately derive from the code which sales list is concerned. |
Description | The description of the sales list. |
The tab Articles contains the complete Recreatex article overview and in this overview you can select (tick off) the articles that are linked to the current point of sale.
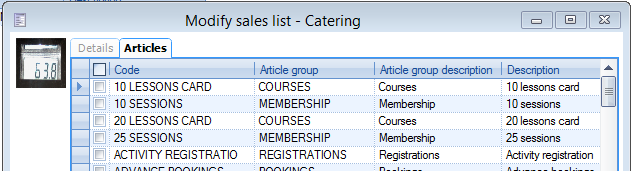 |
Note
If you create a new sales list, the code and possible description will first have to be saved before the article overview will be available under the tab Articles.
Messages
A customer display is often used in combination with cash register systems. This is a screen turned at the customer on which the customer can follow the sales process, for example:
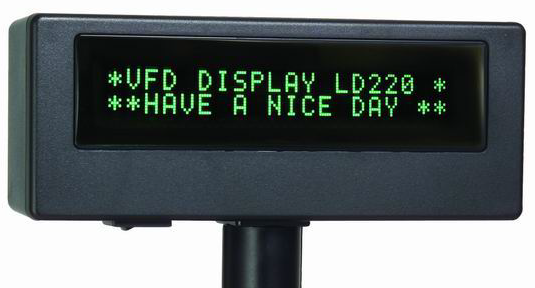 |
The texts that appear on this customer display can be modified in Recreatex if required.
Warning
Pay attention: the codes of the messages refer to specific, internal actions within Recreatex. This means that in case of a modification you can only use an alternative text with the same meaning, and thus not a text with a completely different meaning.
Messages are managed under POS > Settings > Messages.
The list with all messages present in the system will appear.
 |
If you want to modify a message, you have to open the line in question (double-click on it, or click on it followed by <Enter>).
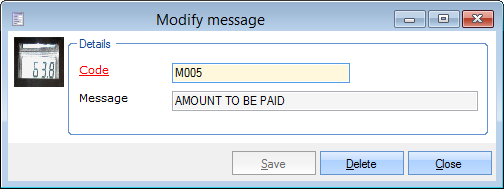 |
Code | This code refers to the internal Recreatex action and may not under any circumstances be modified. |
Message | Here it is possible to change the current message. Do take into account that you only use a variant that has the same meaning, for example Thanks instead of Thank you. |
Kitchen messages
If you work with a sales zone/table plan at the cash register (catering), it is possible to print a separate message on the kitchen printer. You can do this by clicking on a specific button ( ), after which you can choose one of the available kitchen messages. For more details on kitchen messages, see POS - Usemanual 'POS - Use'.
Kitchen messages are managed under POS > Settings > Kitchen messages.
The current list of kitchen messages will appear.
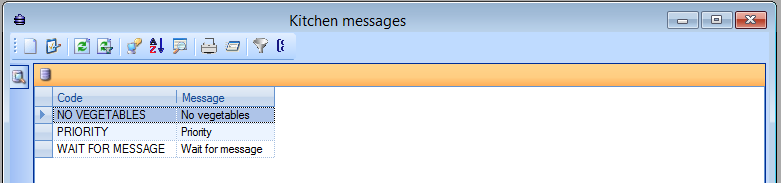 |
You can create, modify or delete kitchen messages at all times.
(see manual 'FRAMEWORK'Framework)
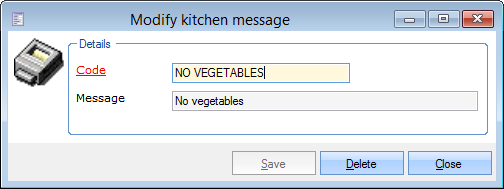 |
Code | Is unique and mandatory. It is advised to choose a relevant code, so that you can immediately derive from the code which kitchen message is concerned. |
Message | The text of the kitchen message. |
Texts
Earlier in this manual, we already described how to place a certain text as a POS button on the POS menu, so that extra info can be added to the sales overview and the receipt while using the cash register
These texts are managed under POS > Settings > Texts.
The current list of POS texts will appear.
 |
You can create, modify or delete texts at all times.
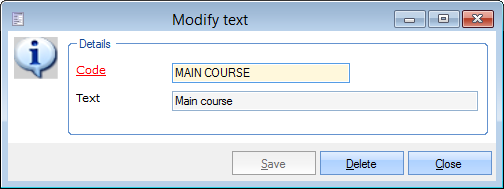 |
Code | Is unique and mandatory. It is advised to choose a relevant code so that you can immediately derive from the code which text is concerned. |
Text | The effective text that will be added to the sales overview and the receipt if you select the linked button on the POS menu. |
POS keyboards and sales keys
The POS keyboards and Sales keys settings are only relevant if a POS keyboard is connected to the system. This type of keyboard is designed for sales environments and features programmable keys, for example:
 |
As the Recreatex POS interface is primarily optimized for touch screens, the use of POS keyboards has become largely outdated and is rarely used today.
More information about configuring or using a POS keyboard is available upon request.
Plug-ins
You can easily connect third-party services to your POS cash register by utilizing Recreatex's framework of pre-designed or custom-made POS plugins.
To set up a POS plugin on your POS system, go to POS > Settings > Plug-ins and open the overview of all plugins that are available for your system. The overview may be empty if you do not use any plug-ins yet.
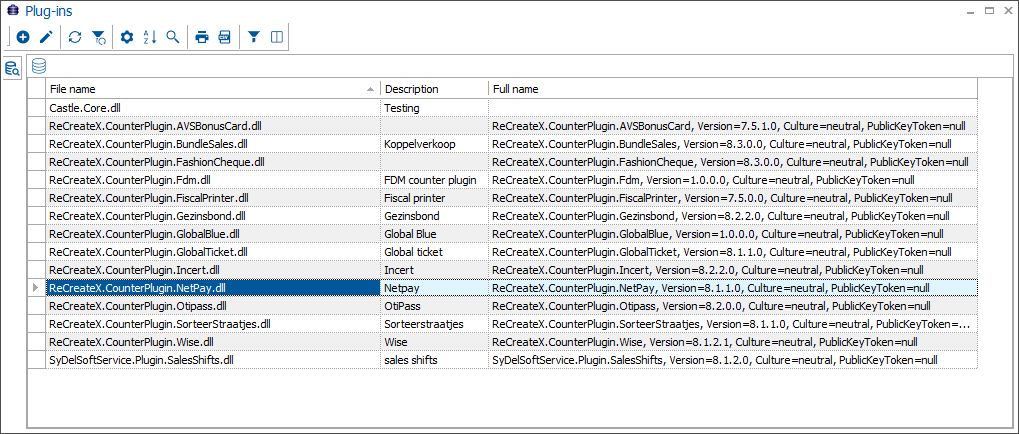
Each plug-in may require specific configuration steps. For all questions regarding availability, activation and price, please contact Gantner.