Employee permissions
This section of the setup guide explains the employee authorization settings in the Recreatex desktop that modifies the default behaviour or flow of the mPOS app.
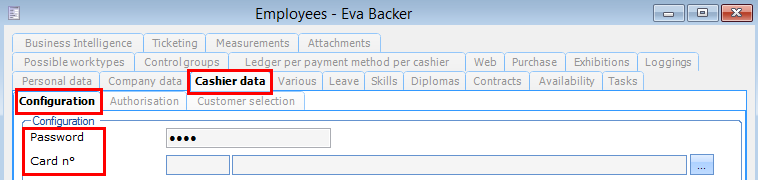
Employee login credentials
The PIN or NFC carrier used to log in, log out and unlock the mPOS app is defined from the tab Cashier data > Configuration on employee level in the Recreatex desktop application.
 |
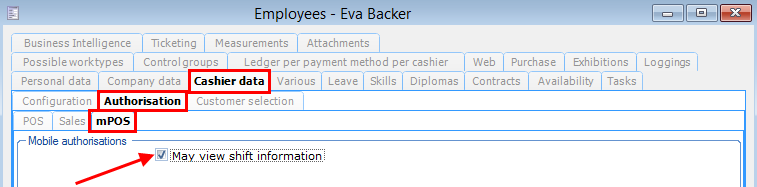
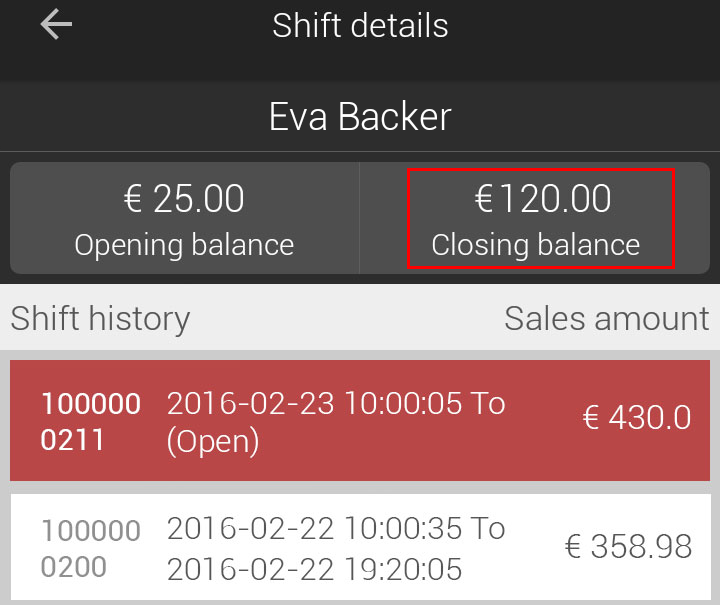
Shift details
The display of the option to view shift details depends on the employee rights setting in the Recreatex desktop application for the parameter, May view shift information.
 |
How it works
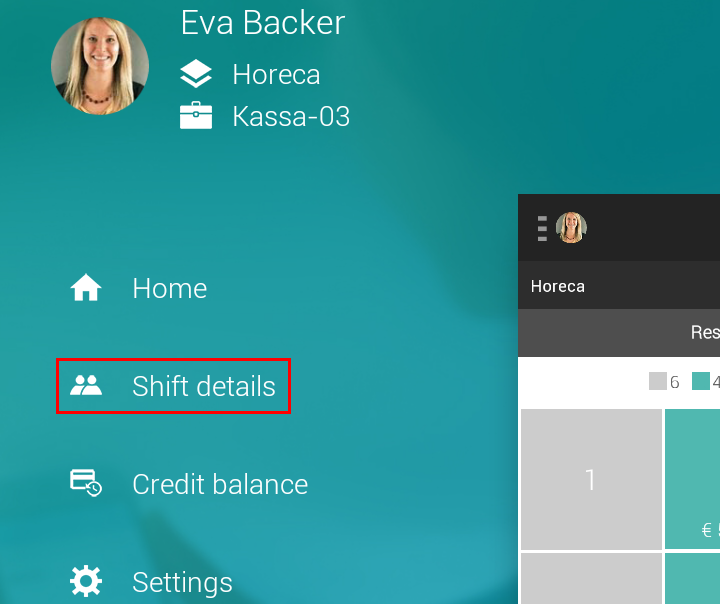
If this parameter is activated, the user will be able to consult his/her shift details from the mPOS menu option Shift details.
 |
Note
Furthermore, it is also possible to switch shift between employees from the Shift details screen.
Switch shift
The ability to switch shift is dependent on the following two parameters:
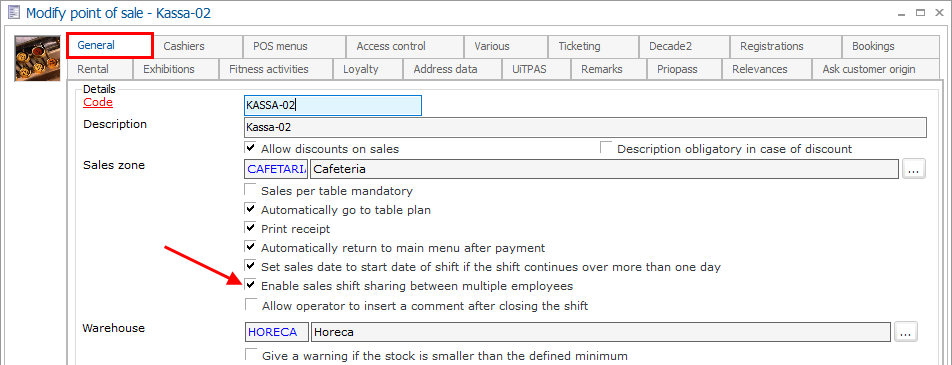
1. At POS level, activate the option Enable sales shift sharing between multiple employees.
 |
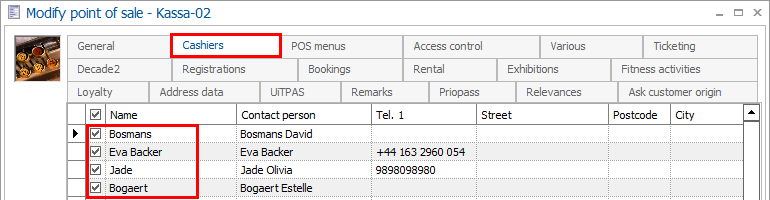
2. At POS level, define employees. Only these employees will be available when switching shift for the POS in question.
 |
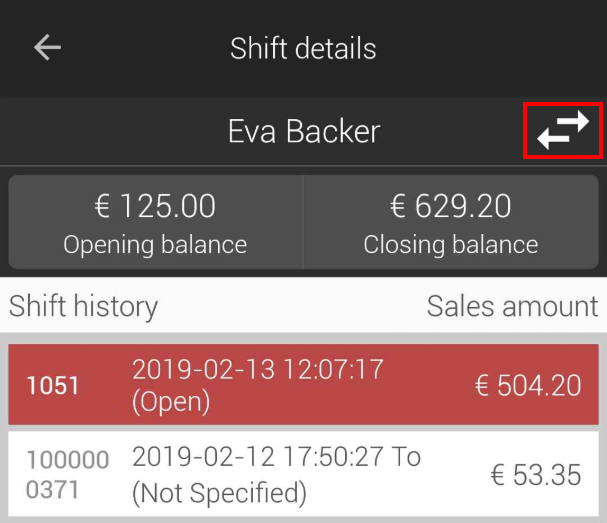
From the app menu, go to Shift details.
 |
On the Shift details screen, tap  in the upper-right corner.
 |
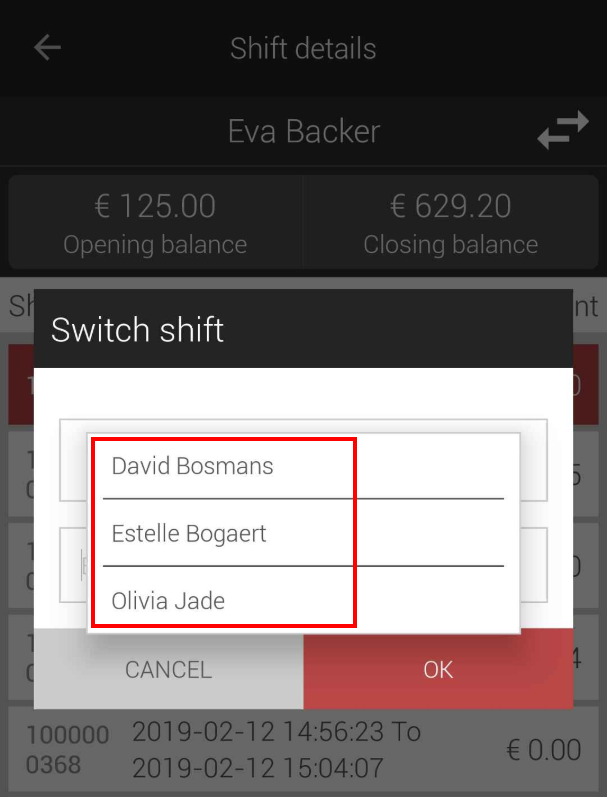
In the resulting pop-up, you will be able to select from the cashiers defined in Recreatex for the current POS.
 |
Employee orders
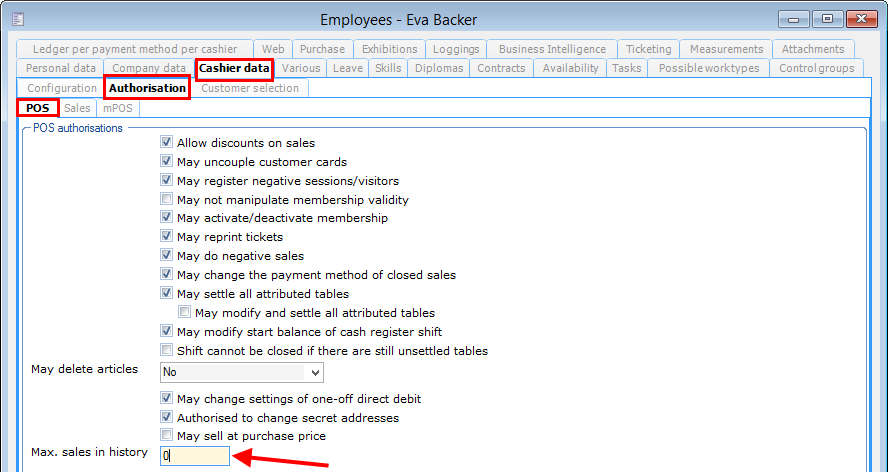
Dependent on the permissions defined at the employee level for the parameter Max. sales in history the employee will be able to consult the defined number of order records for the current shift.
 |
How it works
From the mPOS menu option Shift history, the employee will be able to consult and print orders taken during the current shift.
 |
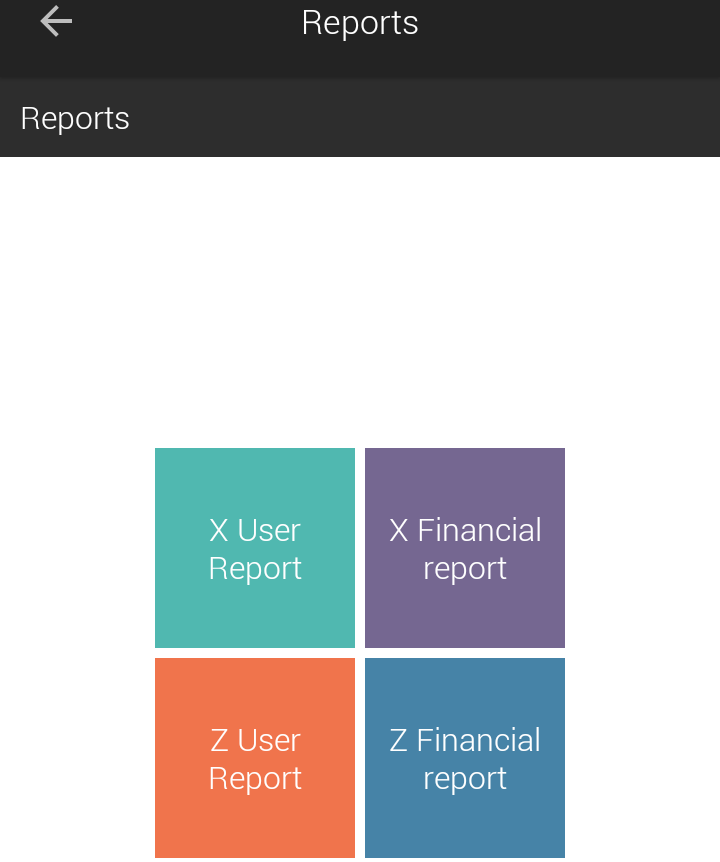
Print day reports
The option to print day report will be visualised on the side menu only for POS configured with GKS.
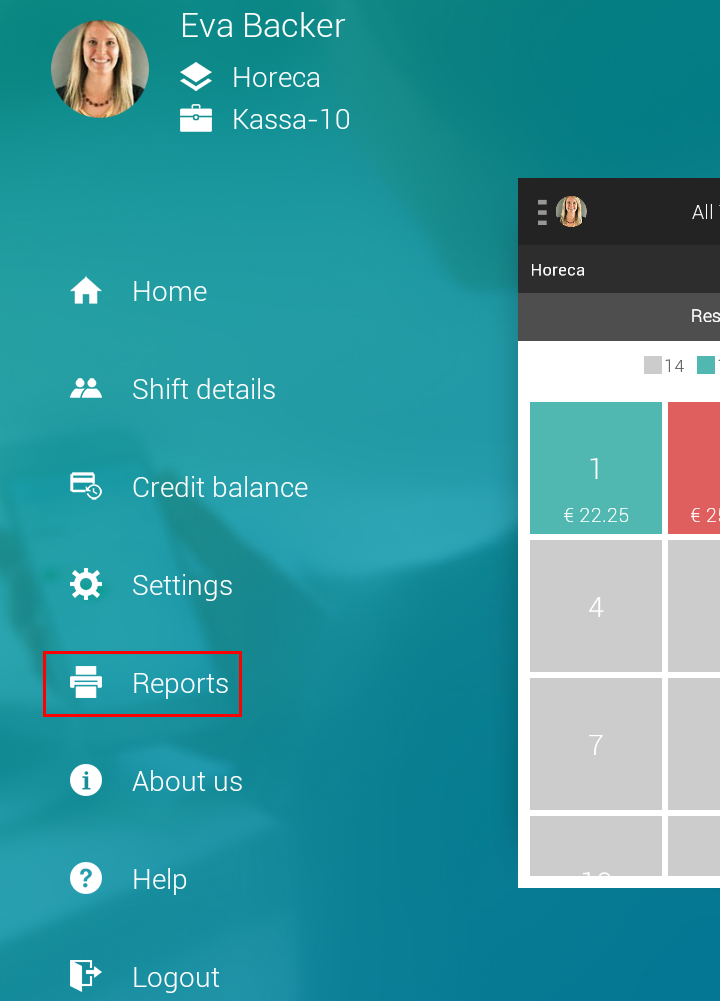 |
However, only authorised mPOS users can print the day reports.
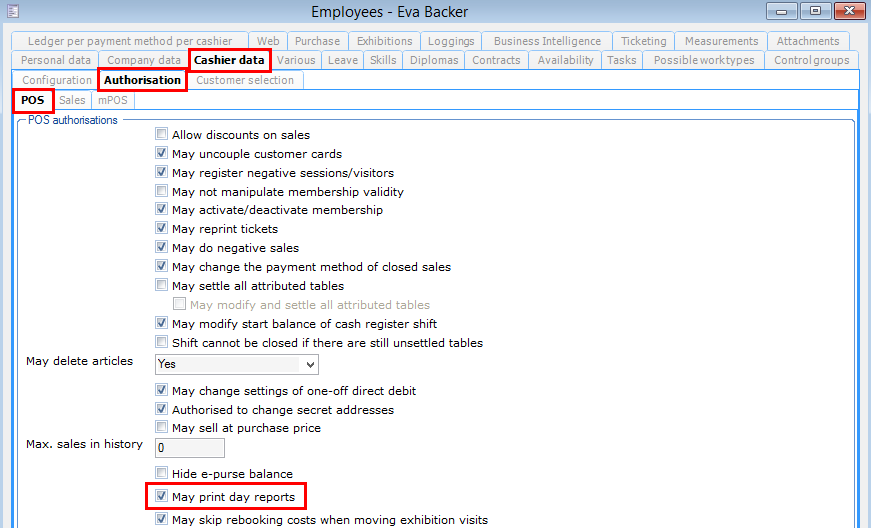
For the mPOS user to be able to print day reports, the parameter May print day reports should be activated under the tab Cashier data > Authorisation > POS of the employee card in the Recreatex desktop application.
 |
How it works
On the mPOS app, when the user taps on any of the Day reports the report will be printed on the printer defined for the instance Checkout.
 |
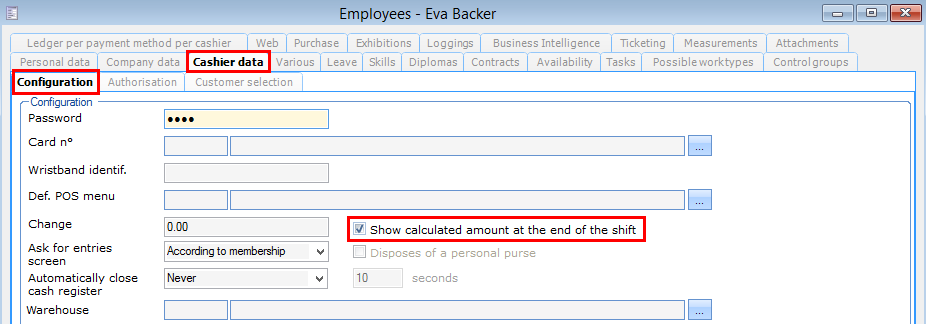
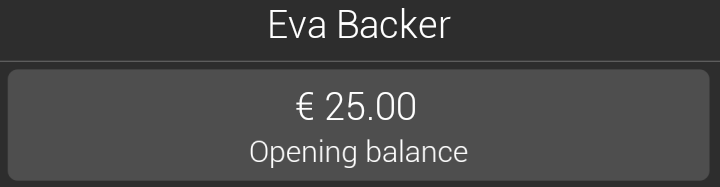
Display closing balance of the shift
The display of the calculated closing balance amount depends on the employee rights setting in the Recreatex desktop application for the parameter, Show calculated amount at the end of the shift.
 |
How it works
If this parameter is activated, the user will be able to consult the calculated opening balance as well as the closing balance from the mPOS menu option Shift details.
 |
If this parameter is deactivated, the user will be able to consult the calculated opening balance only.
 |
Settle table assigned to others
The parameter May settle all attribute tables defines the permissions to modify orders for table assigned to another employee on the mPOS app.
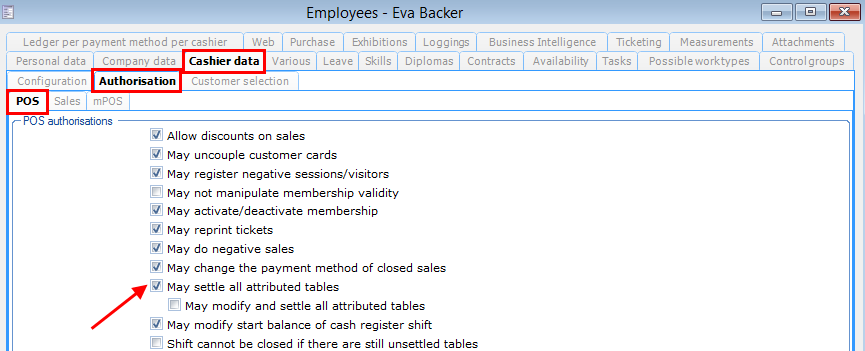 |
How it works
Activating the parameter May settle all attribute tables will allow mPOS user to settle the table assigned to another employee as well as move the order to a table assigned to another employee in the mPOS app.
Modify order item
Dependent on the parameter May settle all attributed tables in the Recreatex desktop application, the mPOS user will have the option to modify the ordered item's quantity on the Basket screen.
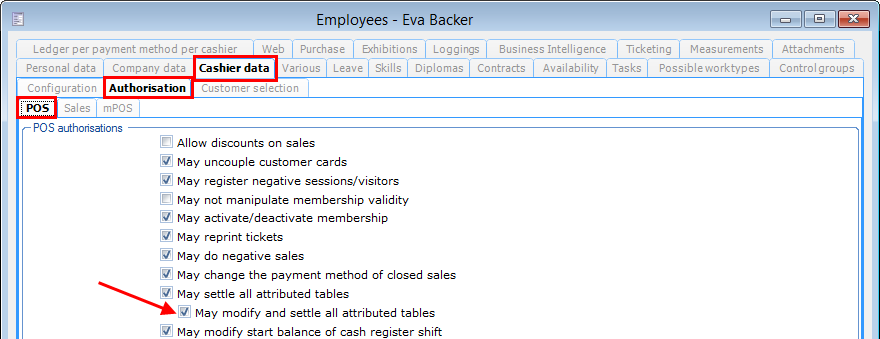 |
How it works
When parameter May settle all attributed tables is activated, the user can increase or reduce the quantity of the ordered item on the Basket screen of the mPOS app.
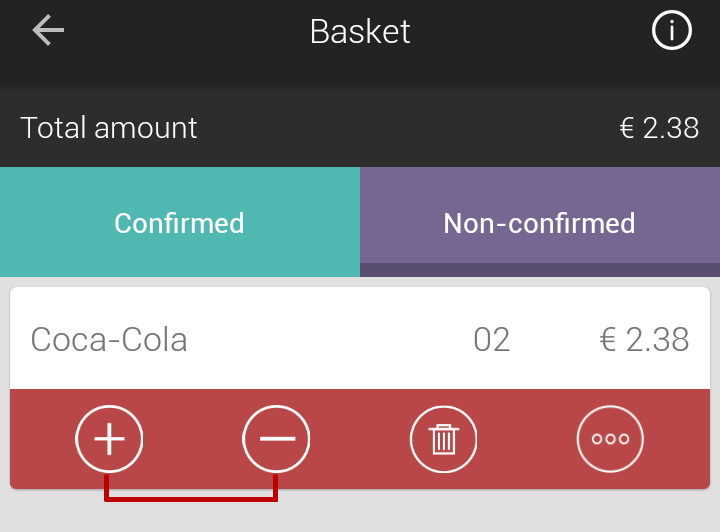 |
If deactivated, the user will not be able to modify order items.
 |
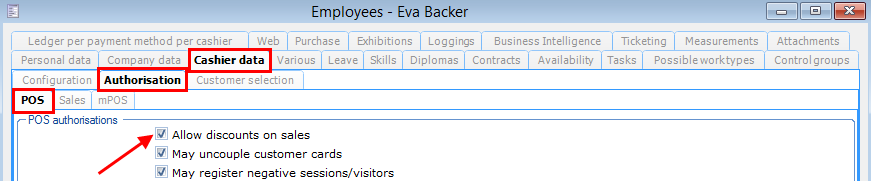
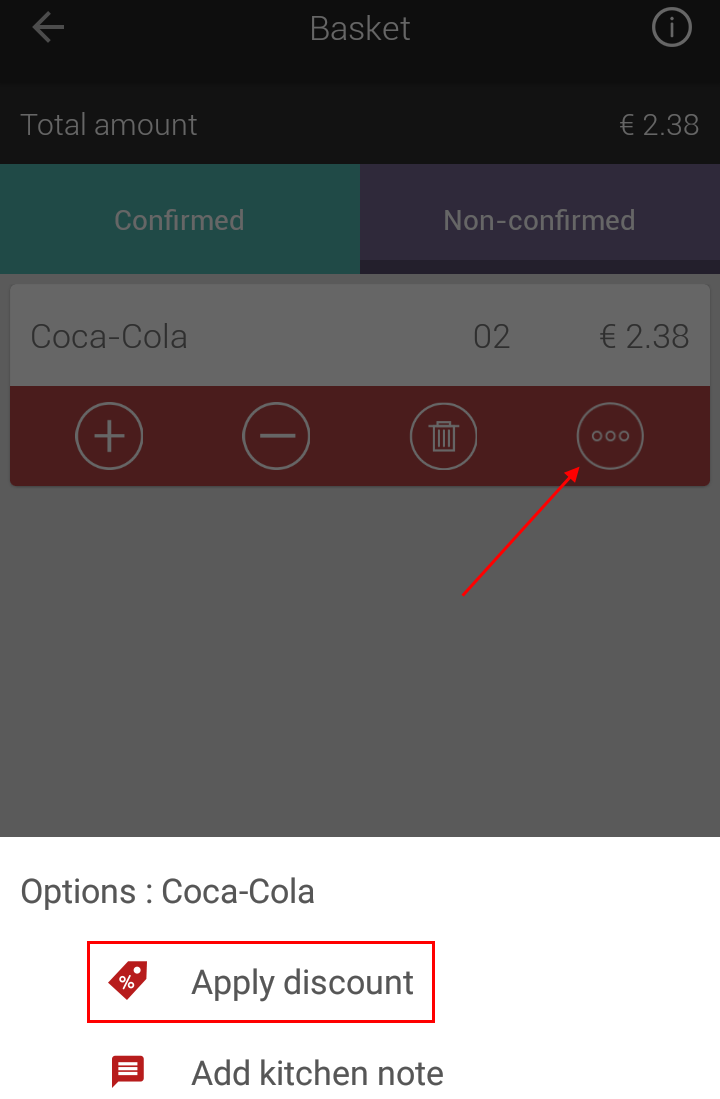
Apply discount at item level
The ability of the mPOS user to apply discount on item level depends on the employee rights setting in Recreatex desktop application for the parameter, Allow discounts on sales.
 |
Warning
Irrespective of the employee authorisation, the mPOS user can apply percentage discount to exhibition ticket sale (from the exhibition detail screen) and the total order amount (from the Checkout screen).
How it works
If this parameter is activated, the option to apply discount at item-level will be shown.
 |
Warning
In a situation wherein the mPOS user can apply discount on item level and to the total order amount, the discount applied right before bill payment will be considered. This means, discount will not be applied twice.
For example, 5% discount is applied to an item. Now, on the Checkout screen 10% discount is applied. In effect, the total payable amount will be discounted by 10%. The discount at individual item will be overwritten.
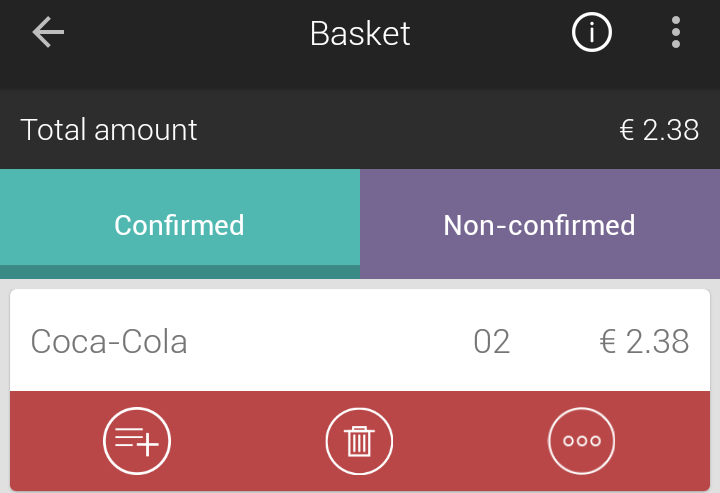
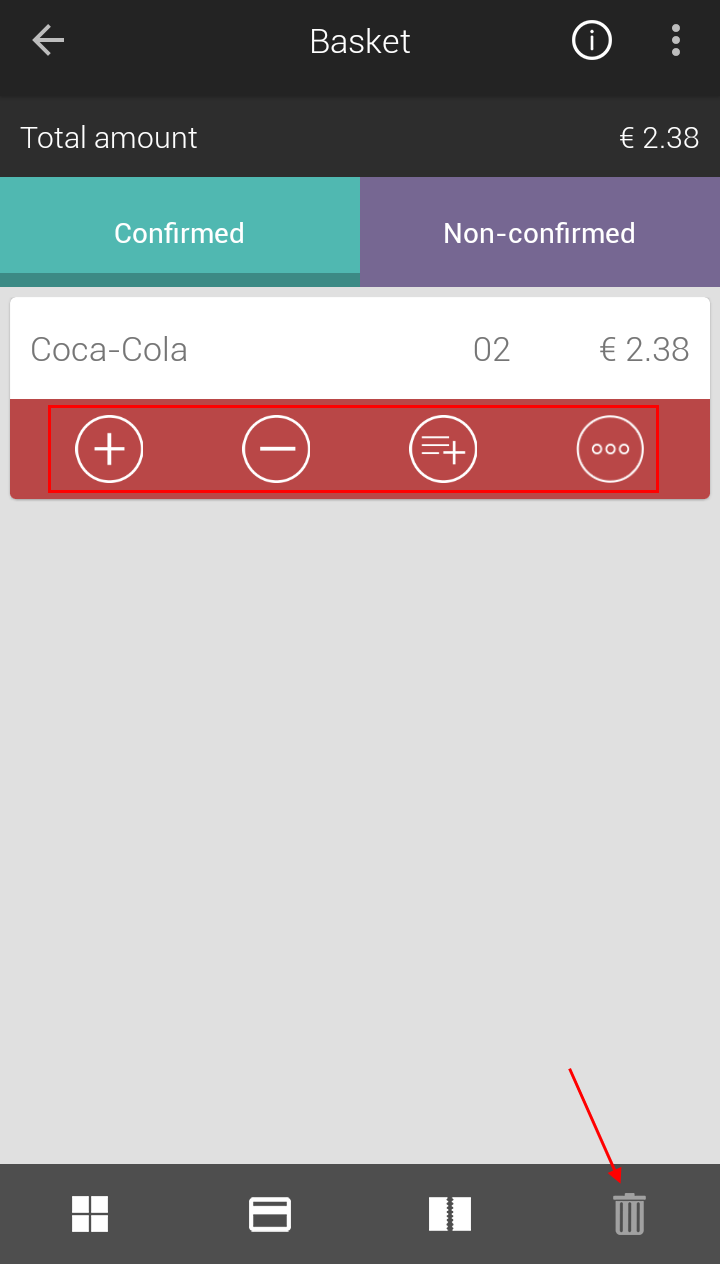
Delete items
The ability to delete ordered items or the entire order depends on the employee rights setting in Recreatex desktop application for the parameter, May delete articles.
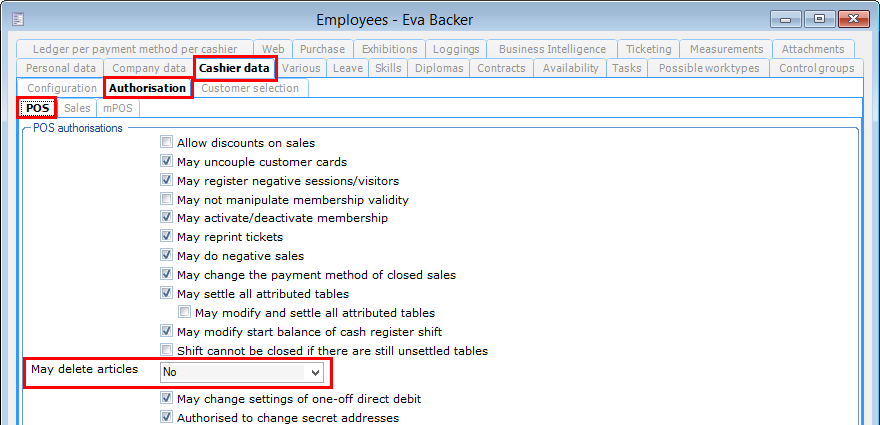 |
How it works
When the parameter May delete articles is defined as No, the delete button  on the Basket screen will be disabled.
Moreover, the option to delete an item will not available for order items.
 |