Ticket sales
When making a ticket sale, an access ticket will be printed in addition to the bill receipt after successful checkout.
Note
The access ticket will be printed from the printer defined in Settings > Printer > Printing instance > Access ticket. See further Printer.
Direct ticket sales
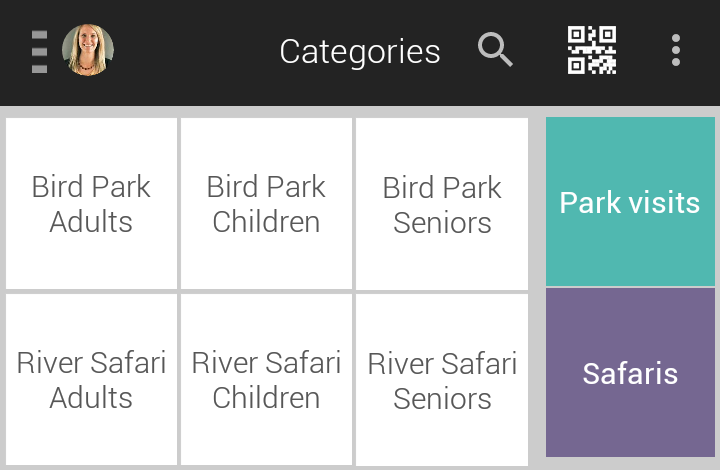
Tap to select an item.
Selecting an item for direct sales functions in the same way as selecting an item for table sales (see further in the section on Select items).
To view the items added to the basket, tap
 . The user will be transferred to the tab Non-confirmed on the Basket screen.
If all the selected items are confirmed for billing, tap
 to move them under the Confirmedtab on the Basket screen.
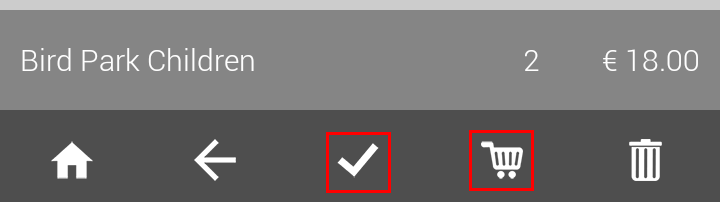
Next, on the Basket screen tap to proceed with checkout.
Note
On the Basket screen, it is possible to manage the ordered items and apply discounts on individual items. See Manage order items.
Tap
to proceed with checkout.It is possible to split the bill before continuing with checkout (see Split bill).
On the Checkout screen, select the customer (if required) and payment method.
Tap Checkout to complete checkout.
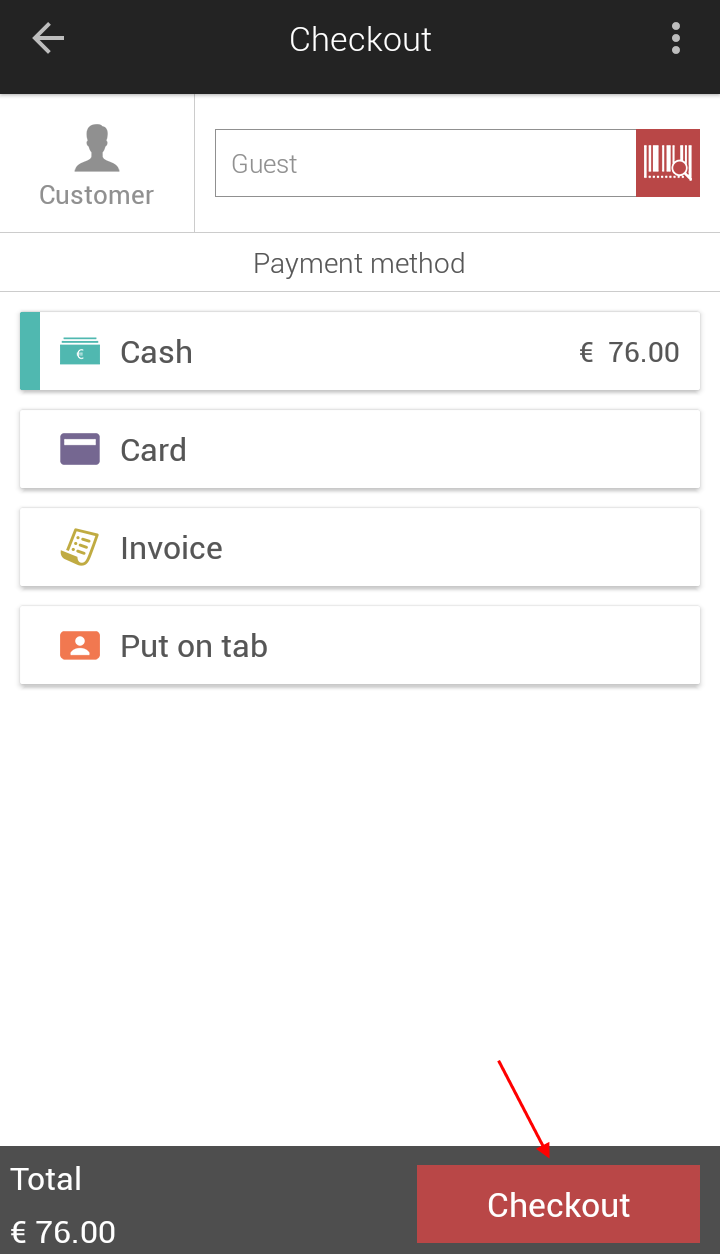
For a more detailed description of the possibilities on the Checkout screen, see Checkout.
Exhibition ticket sales
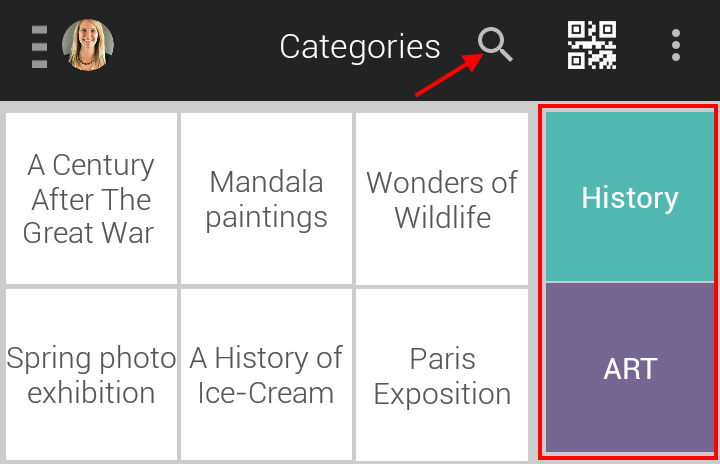
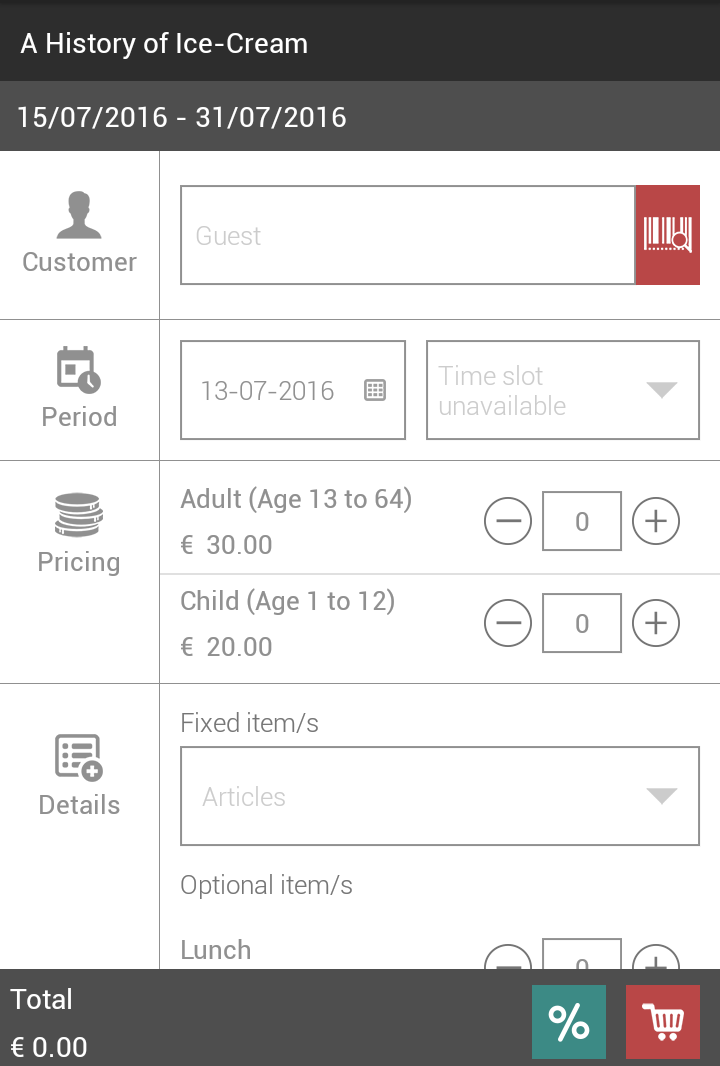
Select an exhibition.

You can look for an item using the search function or by navigating to the appropriate subcategories on the right panel of the screen.
Selecting an exhibition transfers the user to its detail screen. Enter the appropriate details.
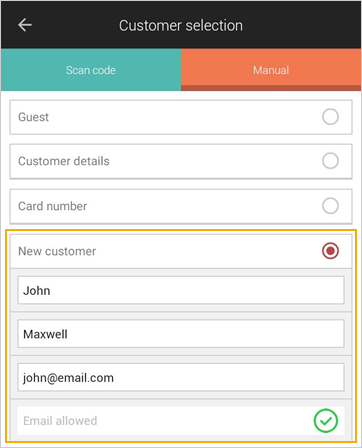
From the mPOS version 3.3.0, it is possible to create a customer from the customer selection screen.
Note
If the parameter Customer mandatory is activated at POS level for Exhibitions in the Recreatex desktop application, it will be obligatory to select a customer for exhibition ticket sales.

Select the date.
Note that on selecting a valid exhibition date, the availability for that day is displayed.
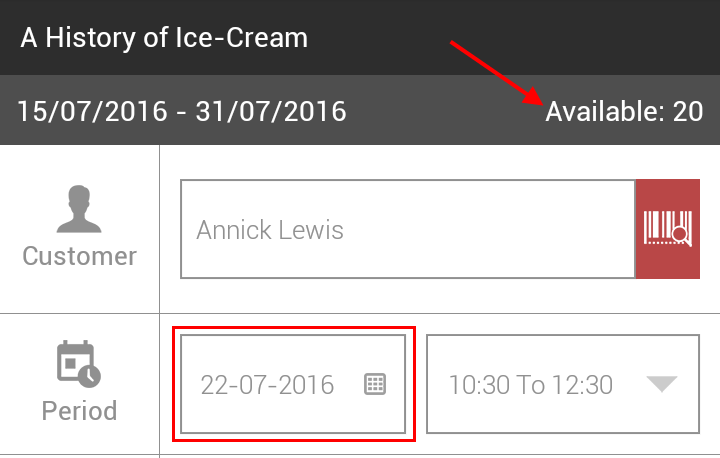
Tap on the time slot to select one of the time slot options.
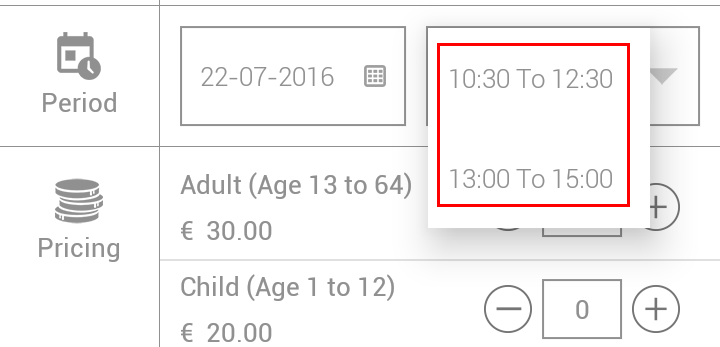
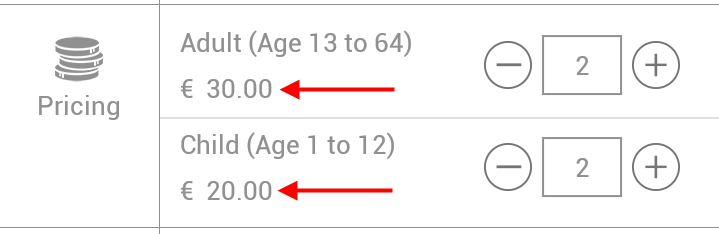
Enter the number of visits per price group.
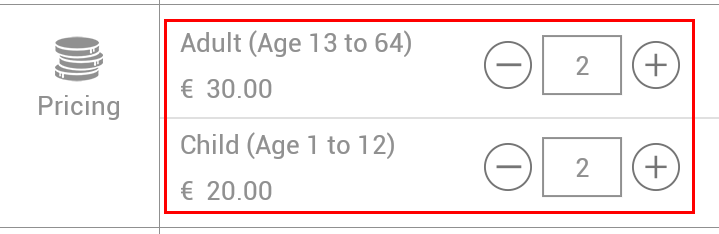
It is possible to manipulate the number of visitors using the + or - buttons or by a long-press on the quantity field.
Note
Note that the total amount at the bottom of the screen is the sum of the visit price and the price of the fixed items that are sold along with each visit.
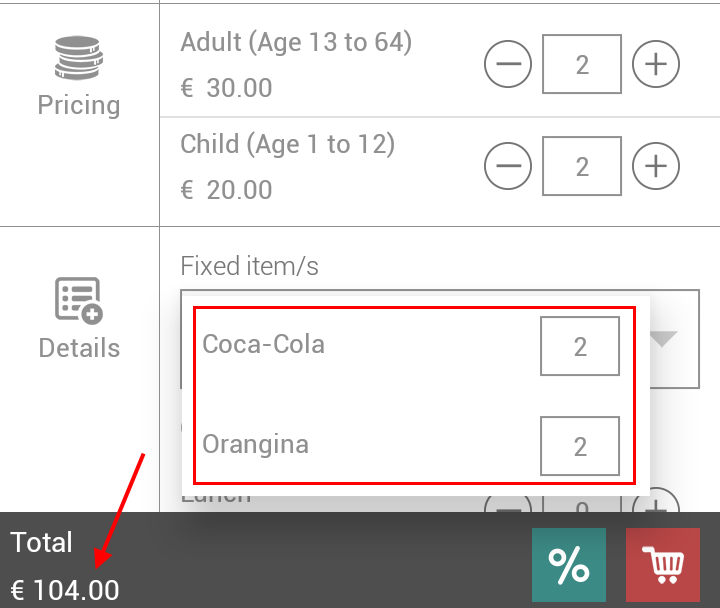
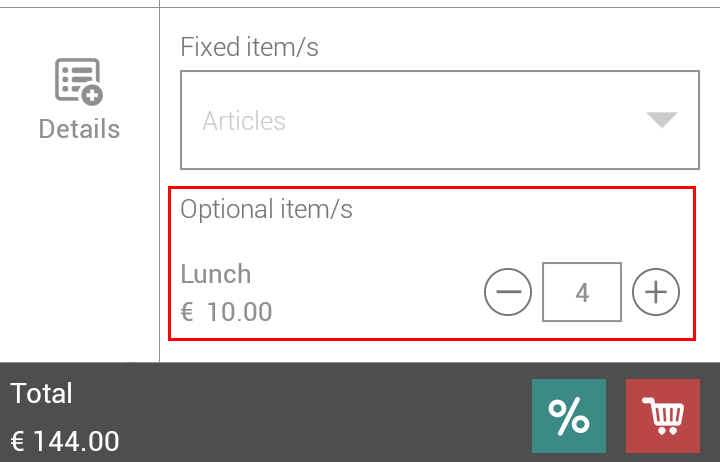
If required, additional items that are available with the sale of the exhibition visit can be added to the order.
Tap
 to apply a discount (if required).
Note
The possibility to apply a discount depends on permissions to allow discounts on employee level and POS level in the Recreatex desktop application.
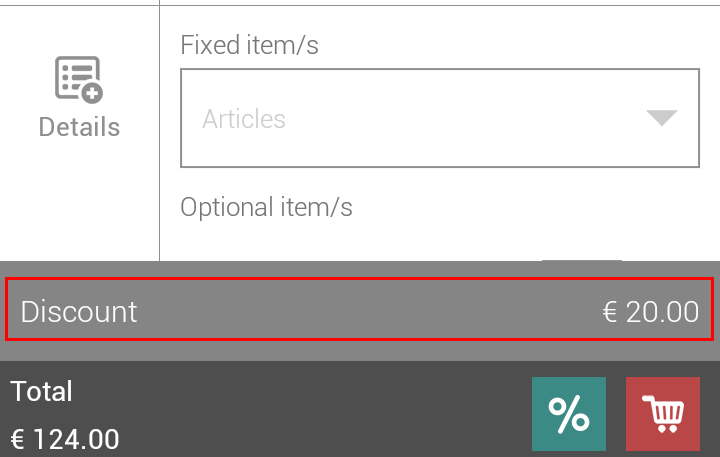
In the resulting pop-up window, enter the discount percentage.
For example, to apply a 20% discount, enter 20.
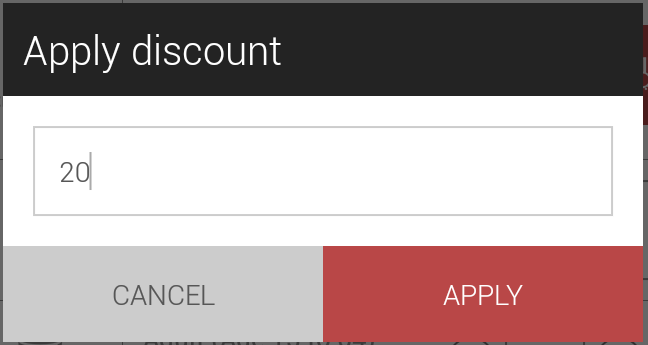
Tap Apply to confirm applying the discount.
Note
The discount is applied on the amount assigned to the selected price group and not to the total amount of the exhibition sale.
Therefore, the price of the automatic items and the additional items are not considered for discount.
A line displaying the discount amount will be visualised for a few seconds before disappearing.
Tap
 to proceed to the basket screen.
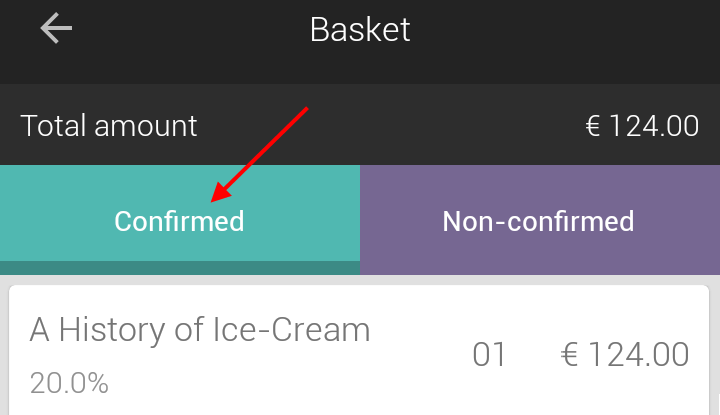
From the Basket screen it is possible to consult the details of the exhibition sale
 or delete it
  .
.An exhibition ticket sale will always be shown under the Confirmed tab of the Basket screen.
Tap
on the bottom of the Basket screen to proceed to checkout.On the Checkout screen, tap Checkout.
Note
The customer selected on the exhibition details screen cannot be changed on the Checkout screen.
It is also possible to apply a discount on the Checkout screen. See further, Apply discount to the basket.
Warning
For exhibition items in the basket, the discount is applied to the amount assigned to the selected price group and not the total amount of the exhibition sale.
|