TaskFlow API installation
Log into the server.
Copy the installation file TaskFlowApiInstaller.msi from the TaskFlow release folder to the server.
Execute the installation file.
Important to know
While setting up the TaskFlow API installer, you will be required to fill in certain details.
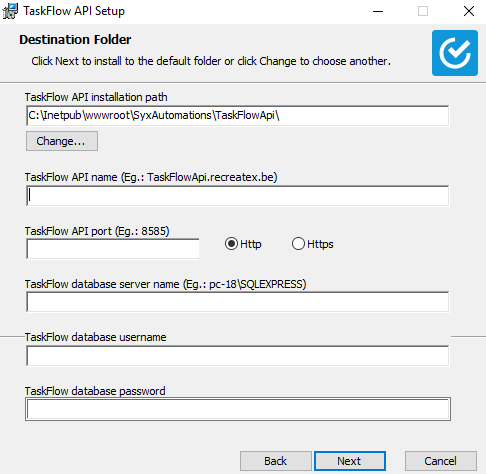
TaskFlow API installation path
The location where the TaskFlow API will be stored on the server.
Note
The folder in which the TaskFlow API is stored on the server must have access rights.
It is recommended to use the default location. Changing the default location of the TaskFlow API affects connection strings. See further, Configure connection strings.
TaskFlow API name
The registered active domain name of the TaskFlow service (mediator service).
Important to know:
The TaskFlow service name could be the name of your company.
For example: TaskFlowMobileApi.gantner.be
In the TaskFlow service name:
Do not use prefix like, http:// or https://
Do not use any suffix like, /
Do not use any special characters
TaskFlow API port
The port number that is unique to TaskFlow service and is not bound by any other site.
Warning
The port number must be greater than 0 and less than 65536. However, the number 80 or 443 must be avoided for being used as a port number.
The ports 80 and 443 listens to HTTP and HTTPS communication respectively, and using either of these could result in an error message or incorrect functioning of the TaskFlow app.
HTTP or HTTPS
Define whether the TaskFlow API accesses HTTP or HTTPS.
Warning
The server and port on which TaskFlow service is running must be reachable at all times by the Recreatex web service. Taking into account that the TaskFlow service and the Recreatex web service are likely on different physical machines, it might be necessary to configure certain firewall settings (inbound and outbound rules) in order to establish the required connection.
The last four fields of the installer are required to be configured for receiving push notifications for the TaskFlow app.
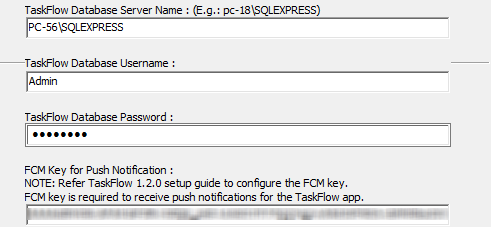
TaskFlow database server name
Enter the name of the database server.
After the TaskFlow API is installed, a push notification database named Taskflow_PushNotification will be created on the entered database server. The database name cannot be changed.
TaskFlow database username and password
Define the username and password for the TaskFlow database.
Note
The database user must have complete permissions on SydAdmin.
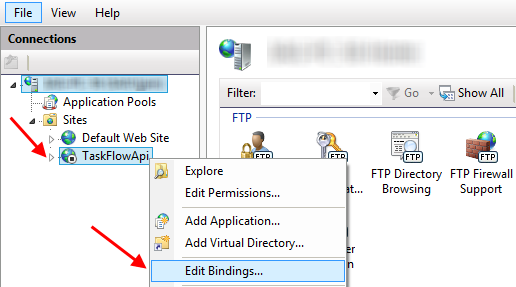
Open IIS Manager.
In the left panel Connections, drill down to Sites > TaskFlowApi.
Right-click on TaskFlowApi siteand select the option Edit Bindings.
In the resulting window, select the record with Port 80 and click Edit.
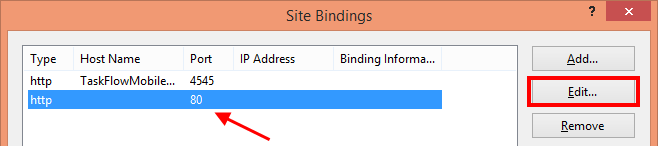
On the Edit Site Binding window, select IP address of the hosted system and click OK.

Note
It is recommended to check whether the values of Host Name and Port match with the values entered in step 3.

hereafter, closethe Site Bindings window.
In the left panel Connections, drill down to Sites > TaskFlowApi.
Right-click TaskFlowApi siteand select the option Explore. The user will be transferred to the location of TaskFlow API (as defined in step 3).
In the TaskFlowApi folder, open Configuration.XML File.
Configure WebshopID and ServiceURL and save the made changes in the Configuration file.
Note
It is possible to configure multiple RCX Service Configurations in single Configuration file.
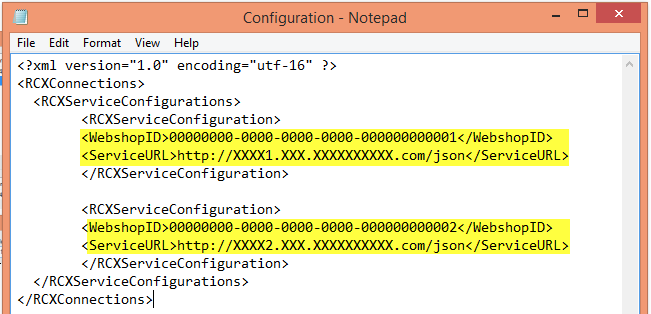
Ensure that the TaskFlow service URL ends in json entered in small letters.
Correct (json)

Incorrect (JSON)

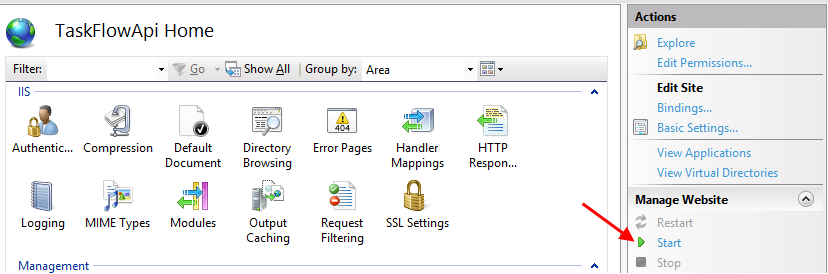
Go to TaskFlowApi site (from the left panel Connections, drill down to Sites > TaskFlowApi)
In the right panel, under the section Manage Website, click Start.
Next, go to section Manage Website > Browse Website and browse the TaskFlow API.
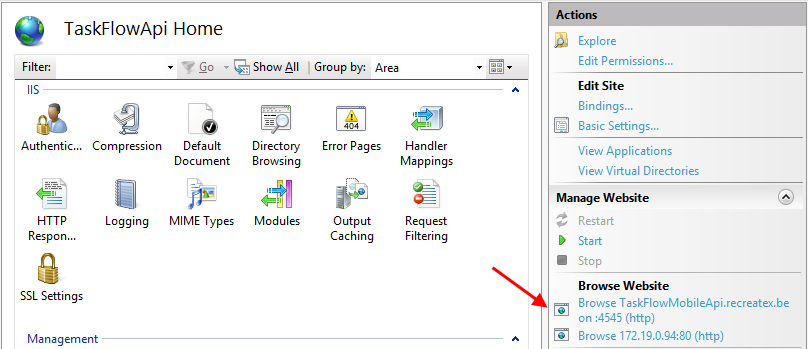
You will be able to see the TaskFlowApi Content in the web browser.
Note
In case the webpage shows an error This page isn’t working, check binding in step 8 and Restart the service.
After server setup, you are required to configure the connection strings. See further, Configure connection strings